
How to use “EditOnPDF (Ver3.x)” -Proofread with PDF-
EditOnPDF was developed for editors to proofread manga manuscripts, etc.
The biggest problem for editors is that there are no applications that can display series tables . In other words, in order to determine the font size by applying the series table to a “printed document” or “iPad screen”, it is necessary to take the trouble of “printing the manuscript data” or “enlarging it to the actual size” .
| By reading this article |
|---|
| ・You can rearrange the order of multiple images and then convert them to PDF. ・You can display a grid display or type gauge on the PDF and check the actual size of the displayed data. ・You can paste images as annotations. ・You can change the pen color and line width. You can use three pen tools and eraser tools ・You can change the PDF display method (two-page spread, continuous, right-handed/left-handed, etc.) |
Contents
- 1 Functional overview
- 2 Open file
- 3 Change display layout
- 4 List annotations
- 5 Increase or Decrease the margins
- 6 Import annotations (requires standard plan or higher)
- 7 Write with Apple Pencil
- 8 Erase annotations written using the “eraser”
- 9 Paste an image as an annotation
- 10 Moving annotations
- 11 Resize annotations
- 12 Use proofreading symbols
- 13 Paste text annotations
- 14 Paste free text annotations
- 15 Save PDF file
- 16 Show ruler
- 17 Display thumbnails and move pages
- 18 Page editing (move, insert, duplicate, rotate, Modify Margins, delete) (Standard plan or higher required)
- 19 Other operations
- 20 summary
Functional overview
First, I will explain the various menus on the screen. It has simple functions and a simple display so that even people who are not familiar with IT can use it.
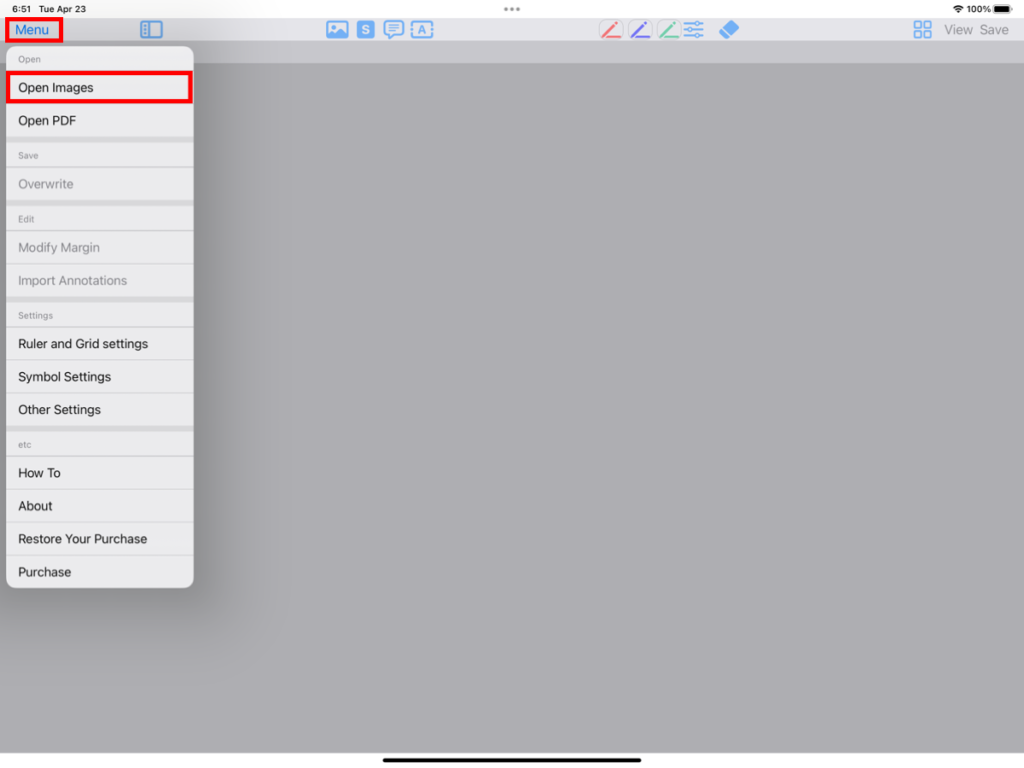
- “Menu”: Open the image or PDF data you want to proofread, increase or decrease margins, change settings such as rulers, etc.
- “List Annotations”: Displays a list of annotations and allows you to filter by username or annotation type.
- “Image annotation”: You can paste image data as an annotation.
- “Symbol tool”: You can select proofing symbols and paste them as image annotations.
- “Text Annotation”: Allows you to paste comments on the page.(Speech bubble icon on display)
- “Free text annotation”: You can paste text on the page.
- “Pen Tool”: Select when writing using Apple Pencil. Can hold three pen settings.
- “Eraser tool”: Delete annotation data written on the PDF. Erase using Apple Pencil.
- “Thumbnail view”: Displays the thumbnail of the open PDF. Touch it to move to that page.
- “View”: Change the display method (spread, continuous, right-handed/left-handed, etc.) and display and set the grid and series table.
- “Save”: Save the edited PDF (automatic save is not supported).

Open file
Generate and open PDF from image file
Touch “Open” and select “Open Image” .
When the “Select file” screen appears, touch “Open” at the bottom right .

Touch the image data (one or more) you want to convert to PDF , and then touch “Open”.

You can see that the file name you selected earlier is displayed in the list. If you want to add it, select the image file again from “Open” at the bottom right .
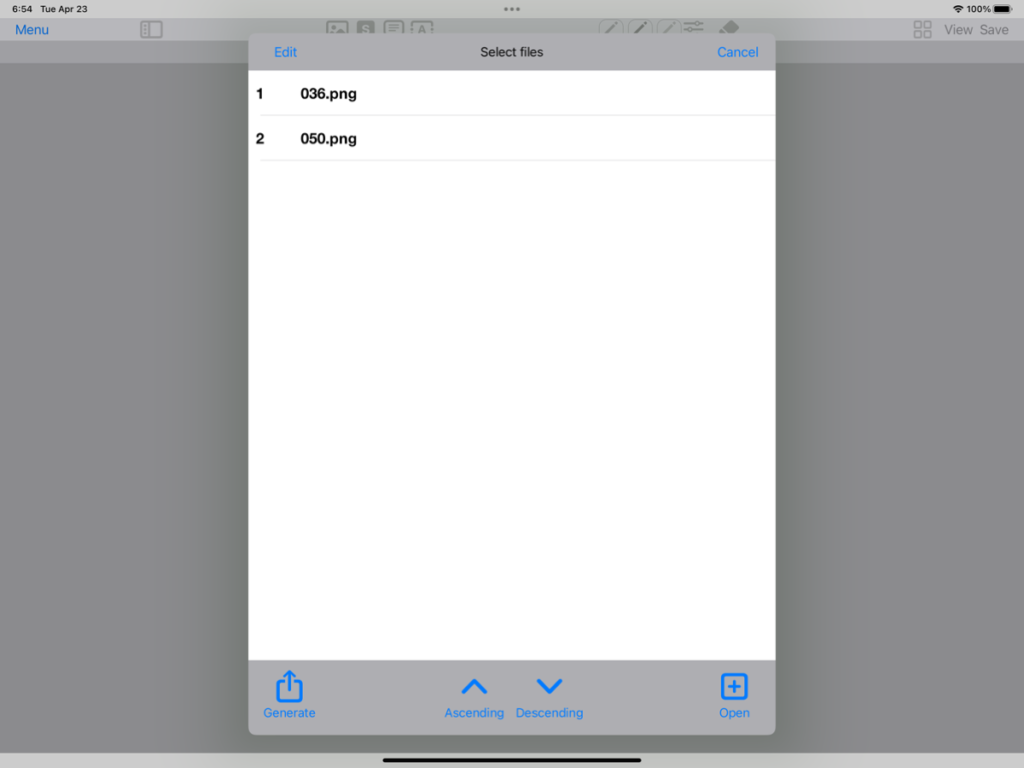
If the selected file is correct, touch “Generate” at the bottom left .
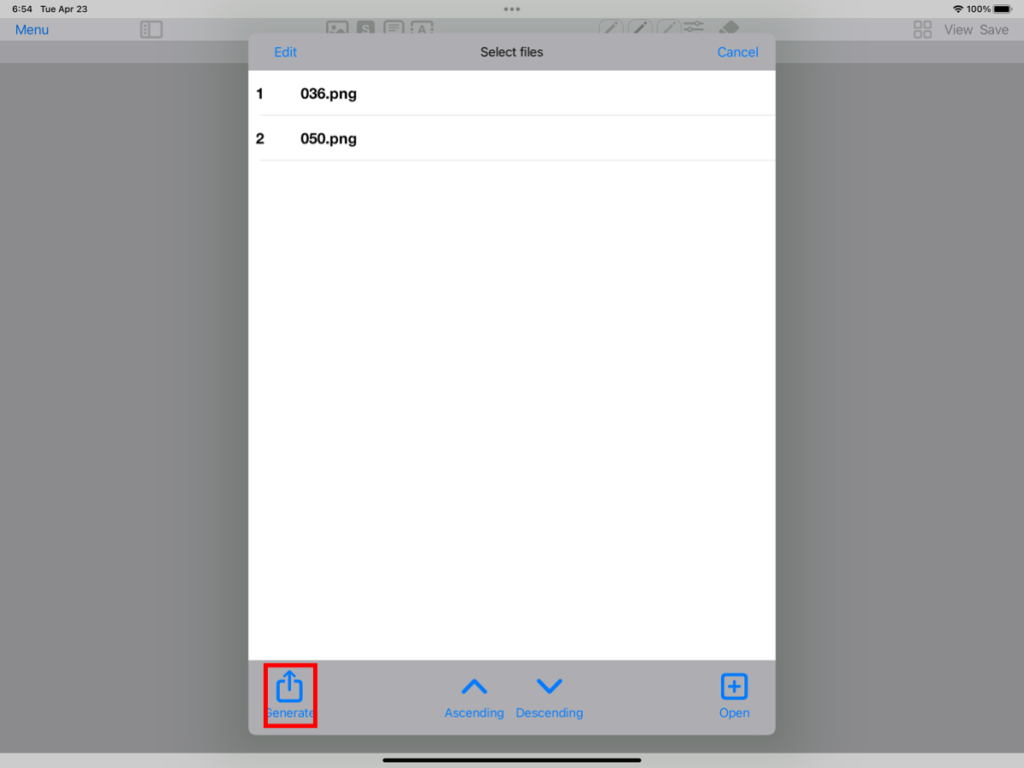
The selected file will be converted to PDF and displayed.

Manually reorder files
If you want to manually change the order of the files , touch “Edit” in the top left.

Once in edit mode, touch and drag the “three-line icon” on the right end of the file name.

When you have finished changing the order, touch “Edit OFF” at the top left to exit editing mode.

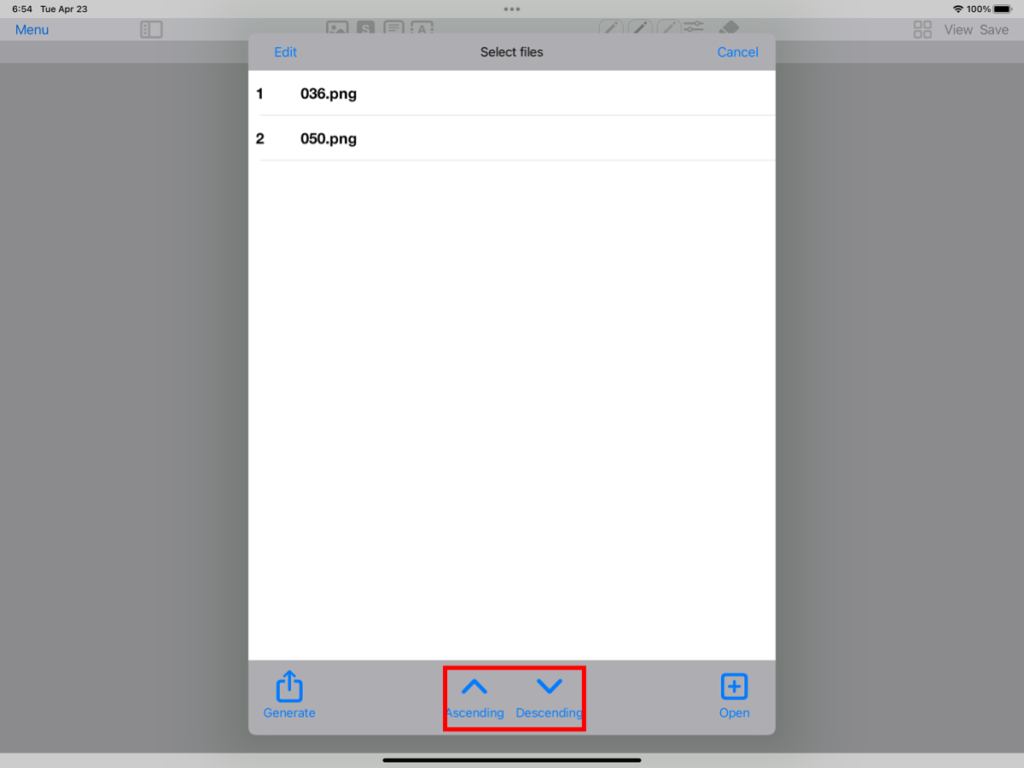
Change the order of files by sorting by file name
Touch “Ascending” or “Descending” at the bottom center to sort by file name.
Open PDF file
Touch “Open” and select “Open PDF” .

When the Select File screen appears, touch the PDF data you want to open .
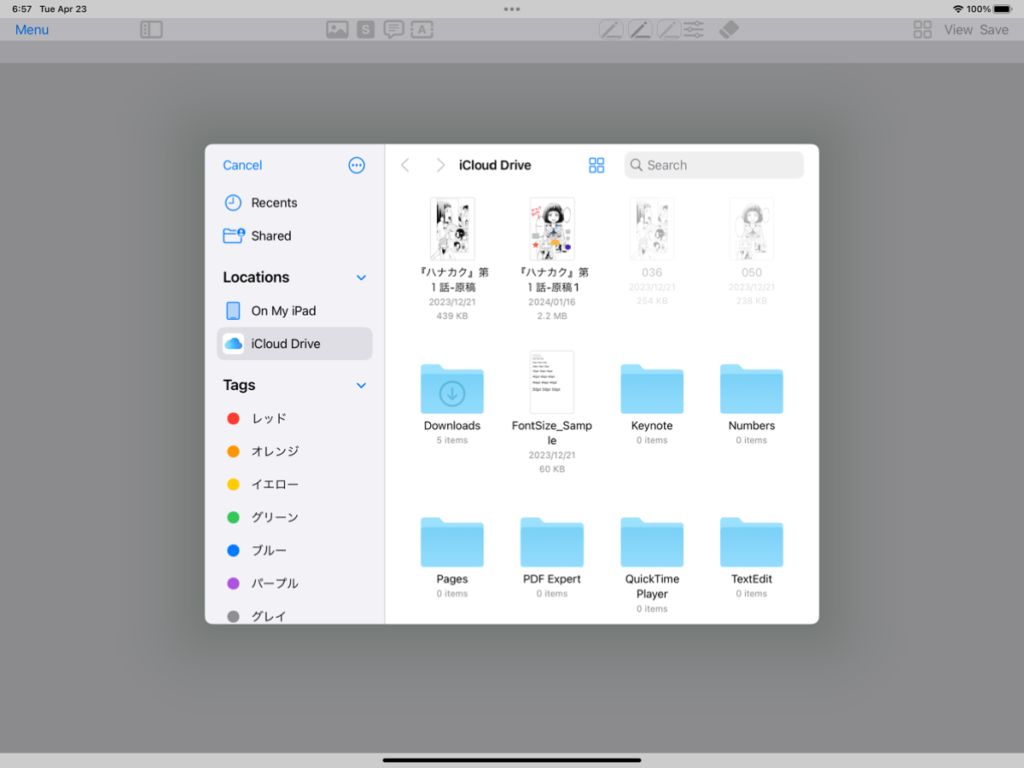
The selected PDF file will be displayed

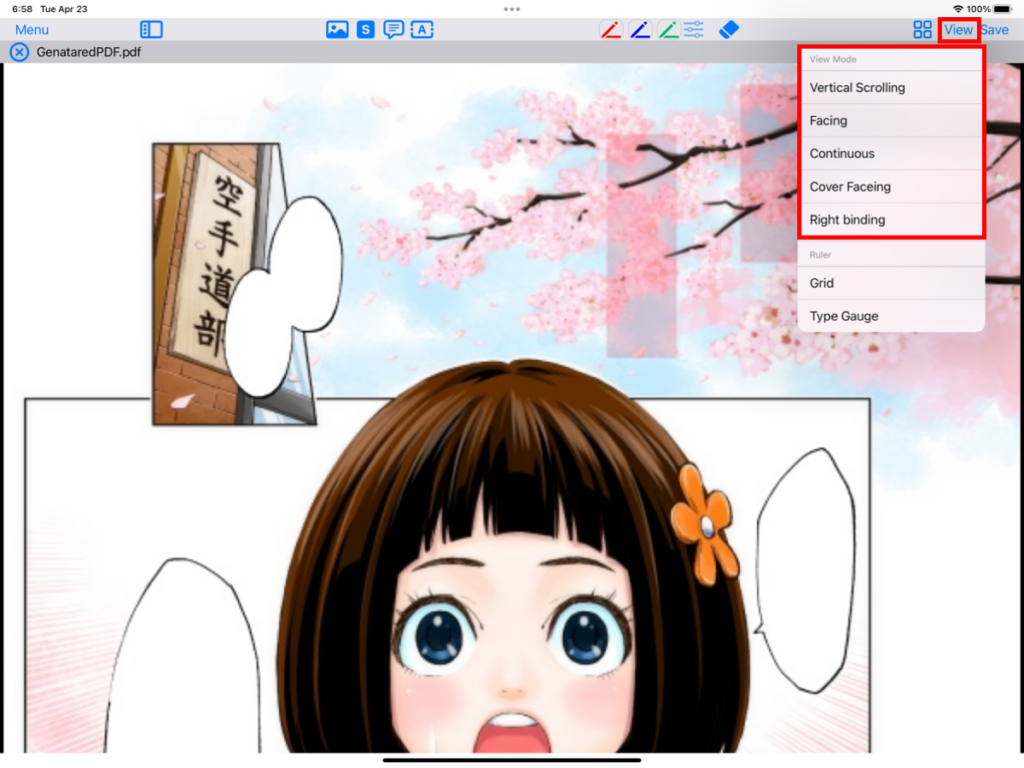
Change display layout
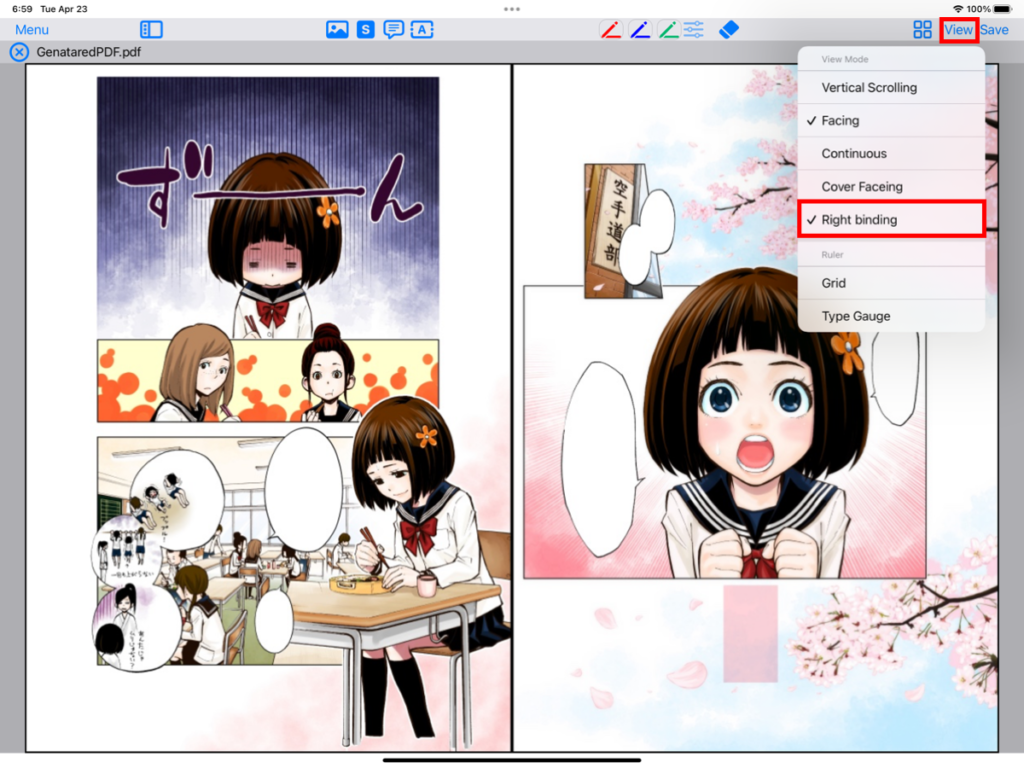
Touch “View” and select the display method.
- “Vertical scroll”: Check this to change the scrolling method for “continuous” display from “horizontal” to “vertical”
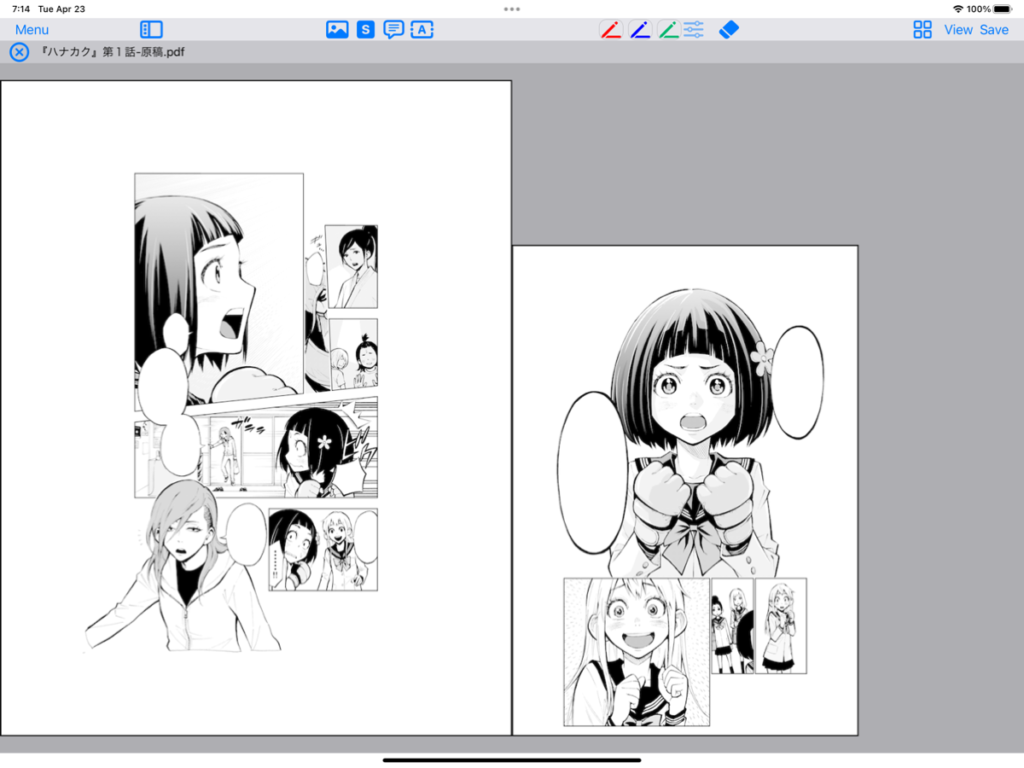
- “Facing”: If checked, you can change from displaying one page to displaying two pages side by side.
- “Continuous”: Display pages consecutively. The display direction changes depending on the “vertical scroll” setting.
- “Cover Facing”: If checked, the first page will be displayed as only one page when in “Facing” display.
- “Right binding”: Check this to change from “left binding” to “right binding”. The sort order and page turning direction by swiping in “Facing” view will change.
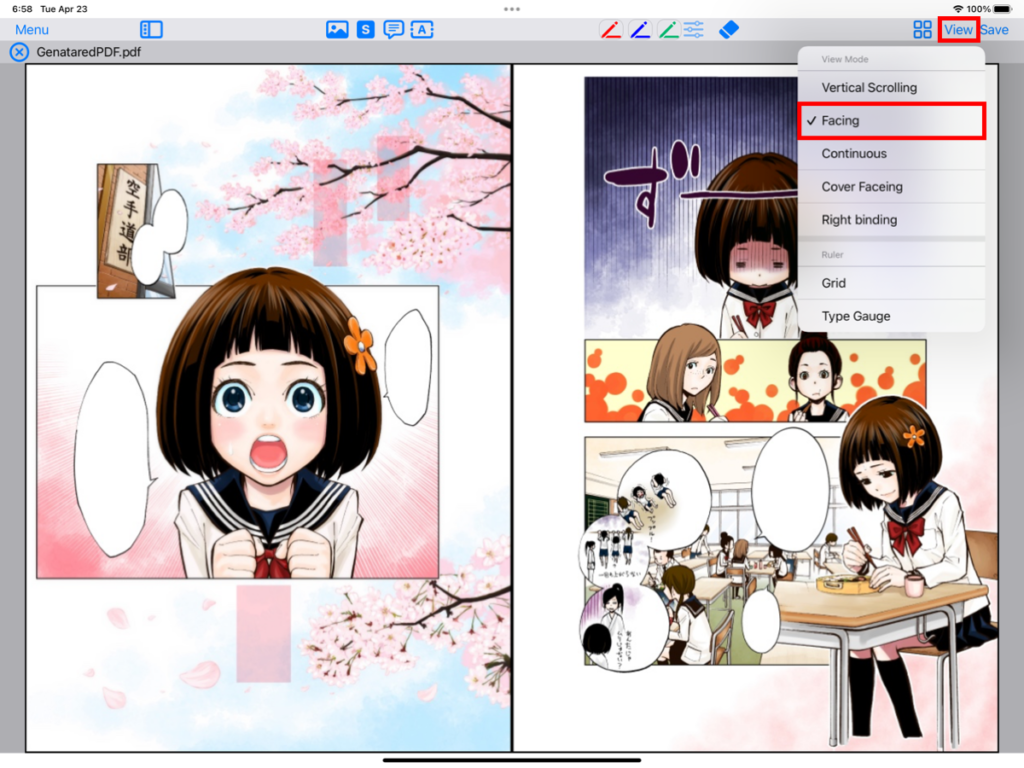
Facing
Touch “View” and select “Facing”.
Switching between “right binding display” and “left binding display”
To switch between “Right binding display” and “Left binding display”, touch “View” and select “Right binding display” .
Toggle “display with cover”
If the first page is the cover and you want the second and subsequent pages to be displayed as Facing, touch “View” and turn on “Cover Facing” .

Vertical scroll display
If you want to display it continuously by vertical scrolling, touch “View” and turn on “Vertical scroll” and “Continuous” .

Horizontal scroll display
If you want to display it continuously by horizontal scrolling, touch “View”, turn “Vertical scroll” off, and turn “Continuous” on .

At this time, if you switch between “right binding display” and “left binding display”, the order of the pages will be reversed.

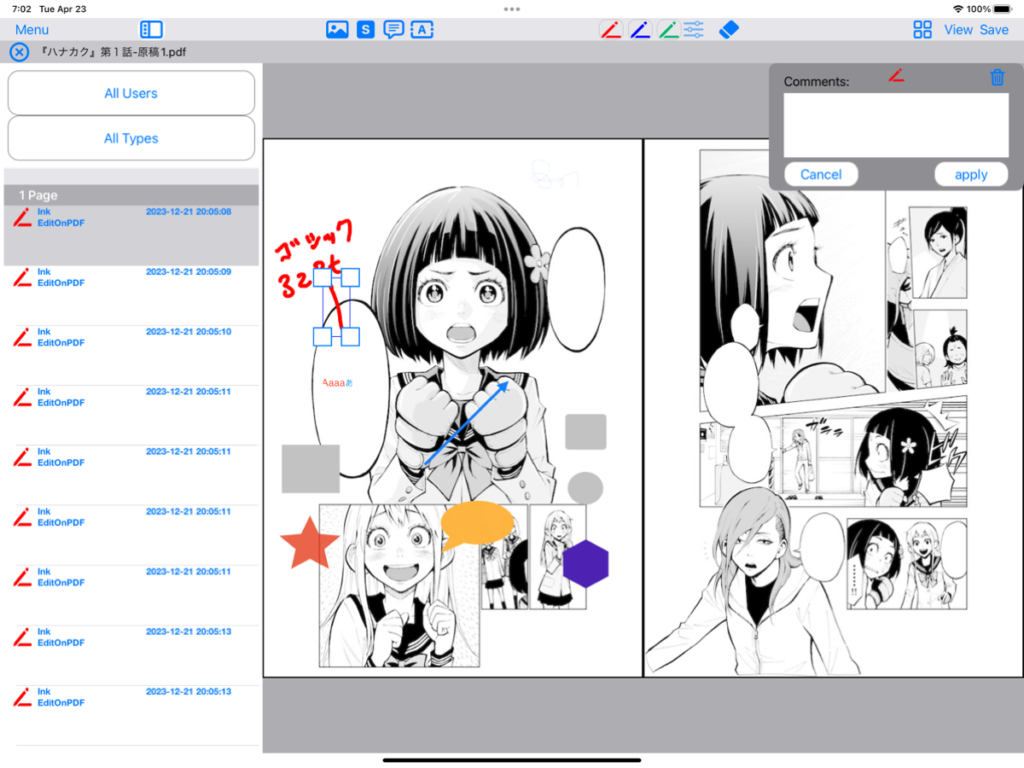
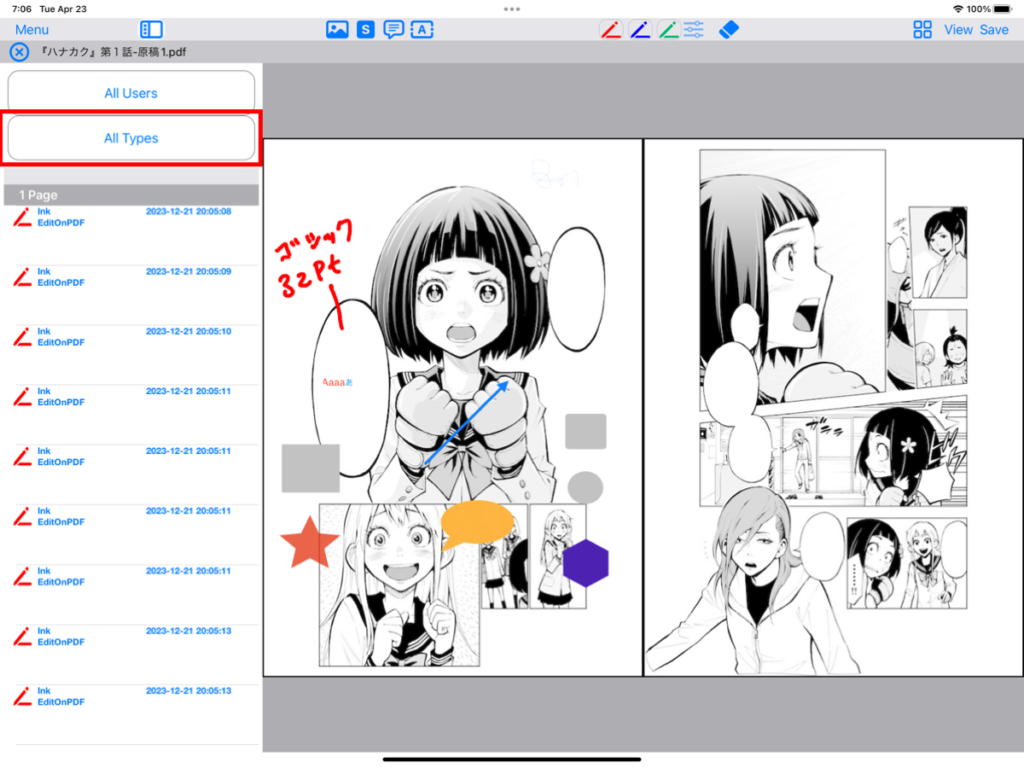
List annotations
Display annotation list
Touch the “List Annotations” icon .

A screen displaying a list of annotations will be displayed.

If you touch a listed annotation, the display will move to the annotation position and the annotation will be selected.
Filter annotations by username
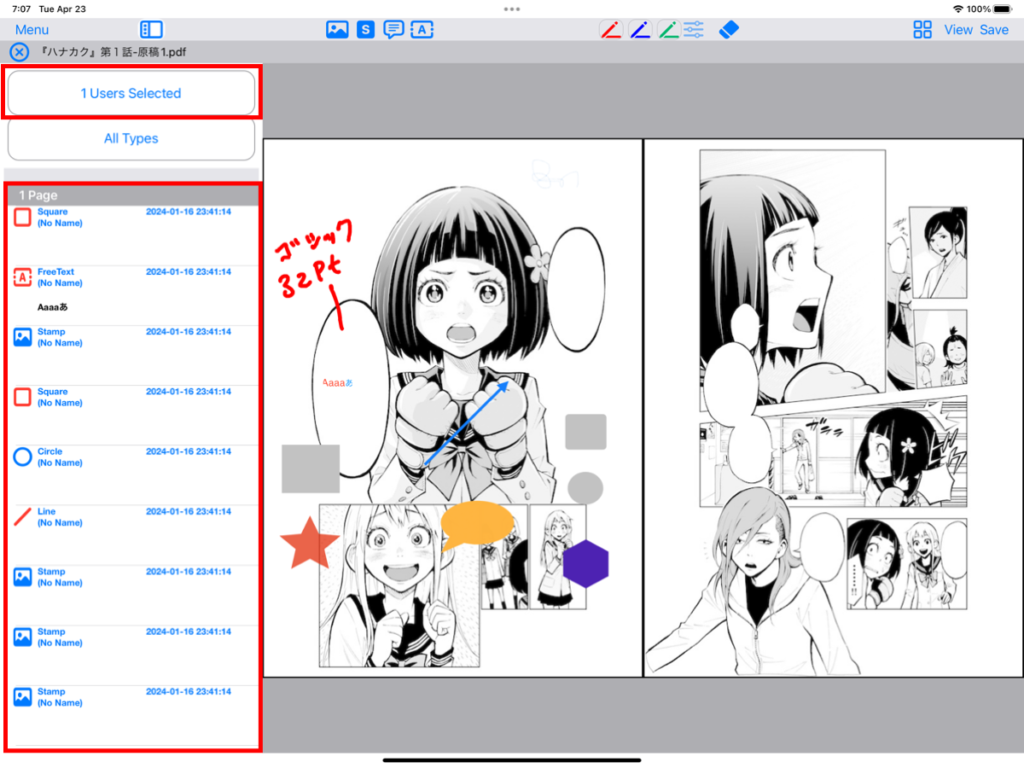
Touch “All Users” at the top of the annotation list.
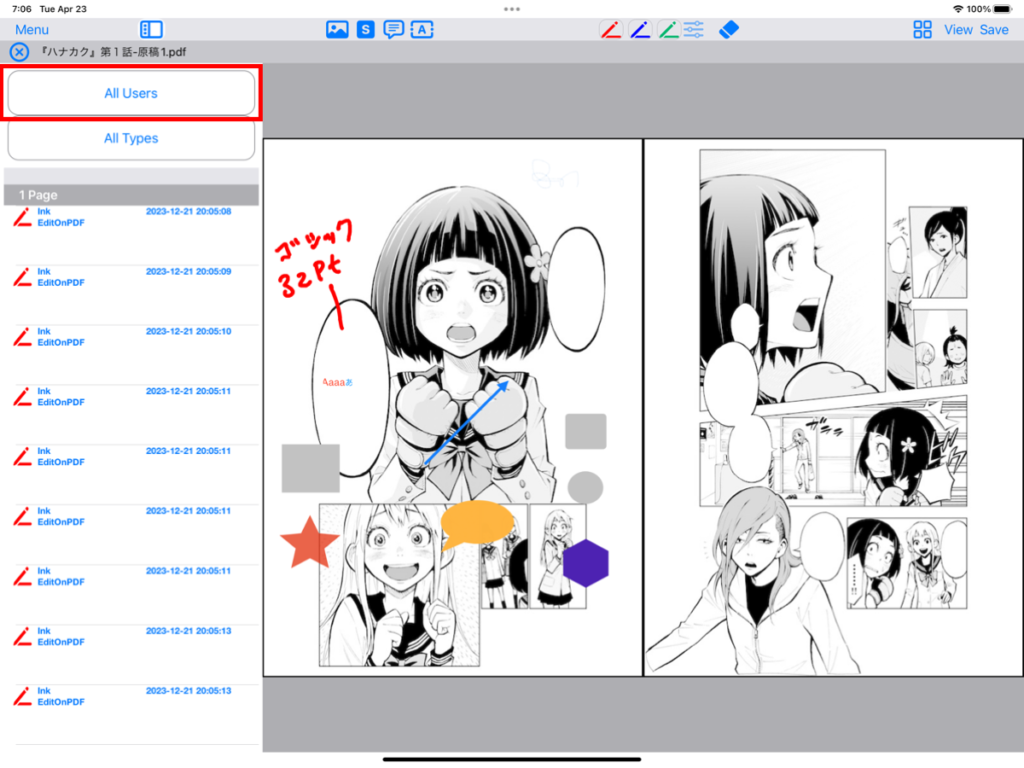
A list of user names that entered annotations will be displayed. Here, touch and uncheck the usernames you do not want to display.
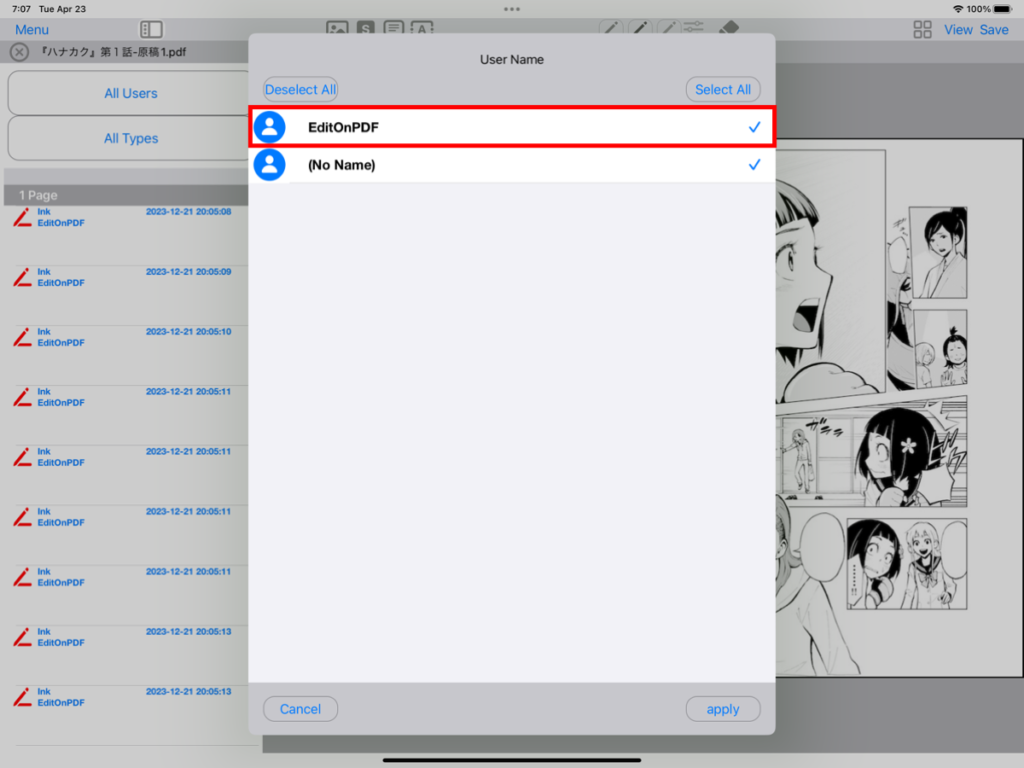
Once the check is removed, touch “Apply”.

The display at the top of the annotation list will display “1 users Selected” and annotations entered by unchecked users will no longer be displayed in the list view.
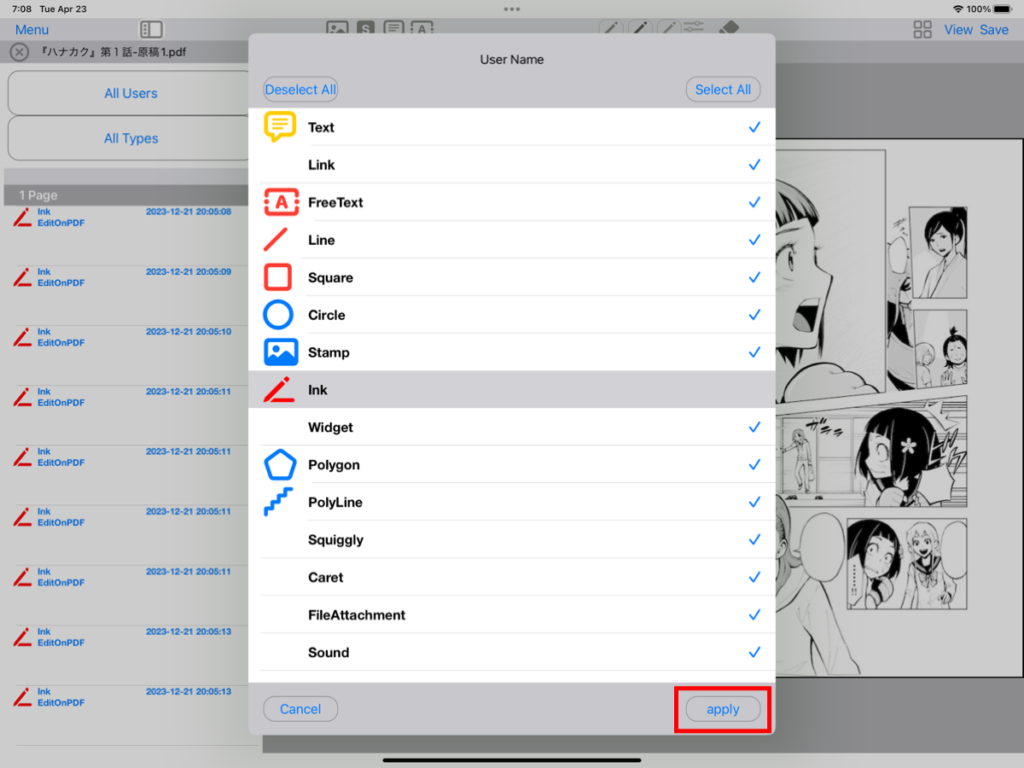
Filter annotations by annotation type
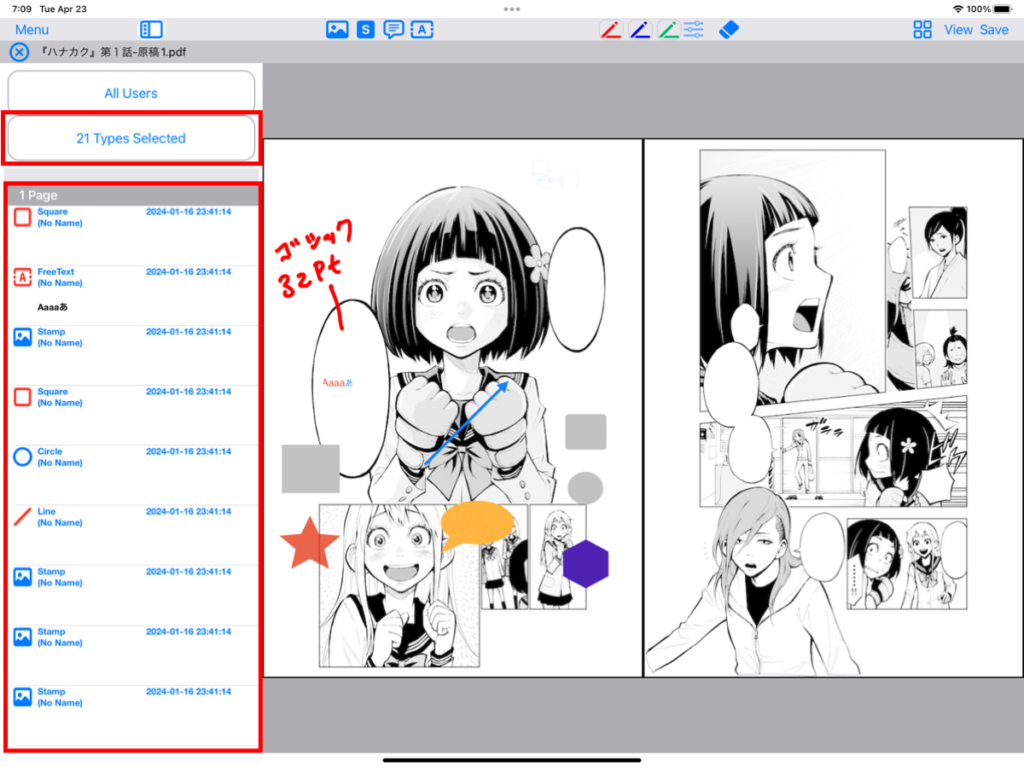
Touch “All Types” at the top of the annotation list.
Annotation types are listed. Here, touch the annotation types you don’t want to display to uncheck them.

Once the check is removed, touch “Apply”.
The display at the top of the annotation list will display “21 Types Selected” and the unchecked annotation types will no longer be displayed in the list view.
Change user name when entering annotations
Touch “Menu” and select “Other Settings” .
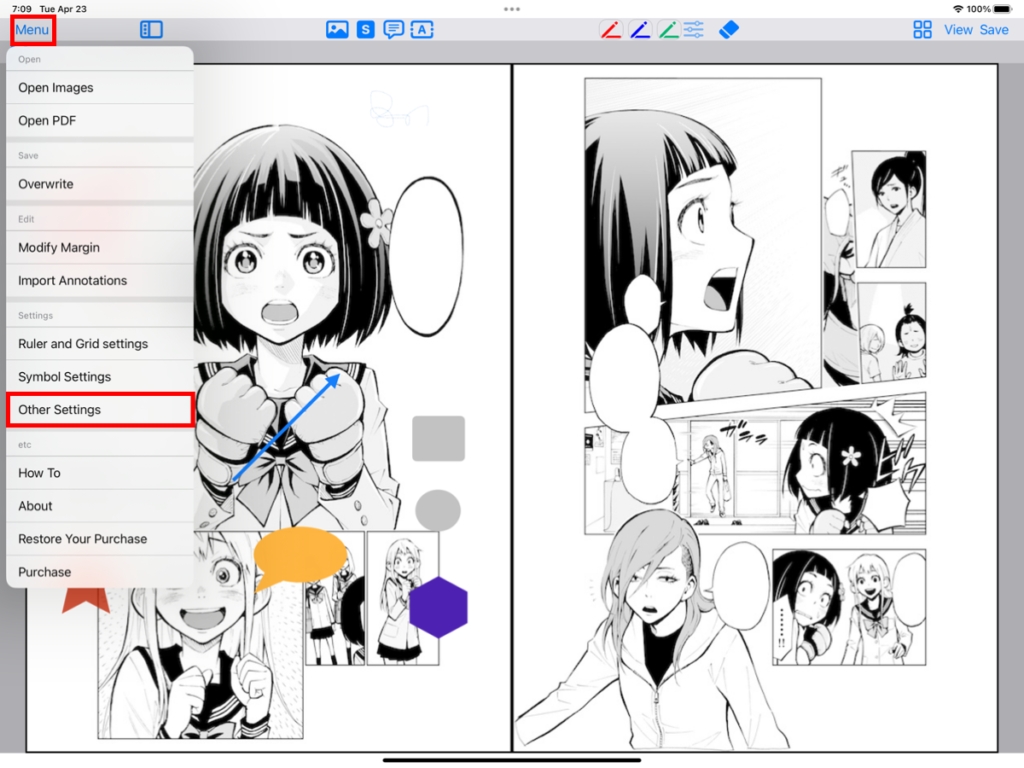
Edit the text entered in the username.
After editing the text, touch “Apply”.
Change the display position of the annotation list
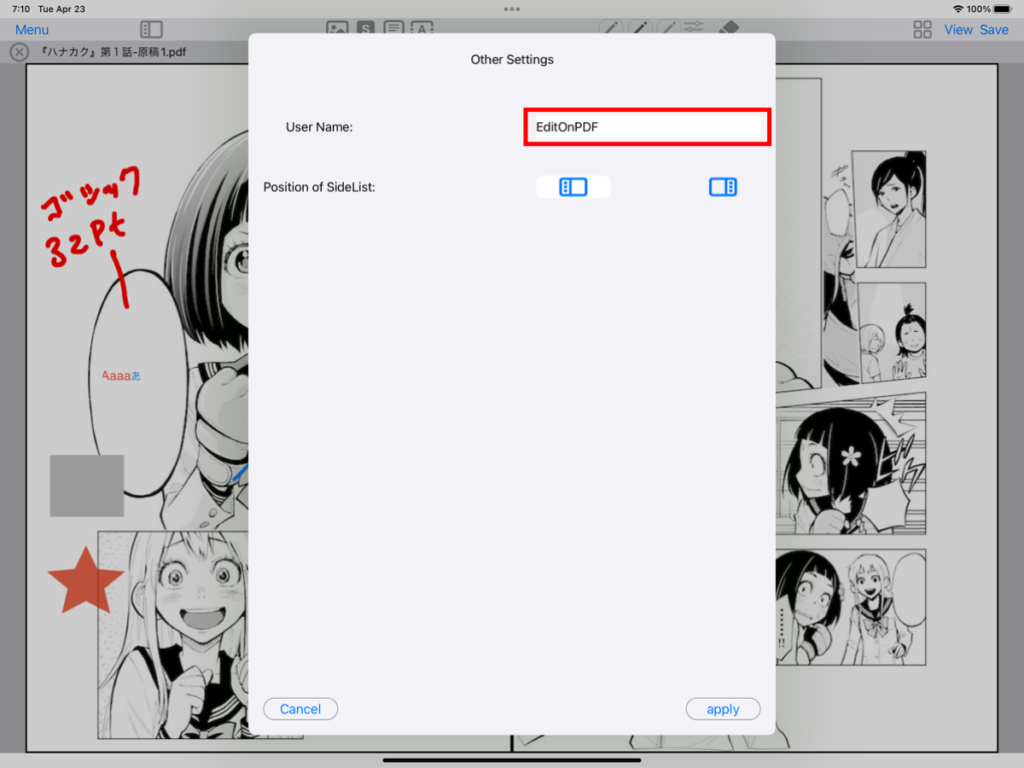
Touch “Menu” and select “Other Settings” .
Select the icon in the position of SideList where you want to display the annotation list.

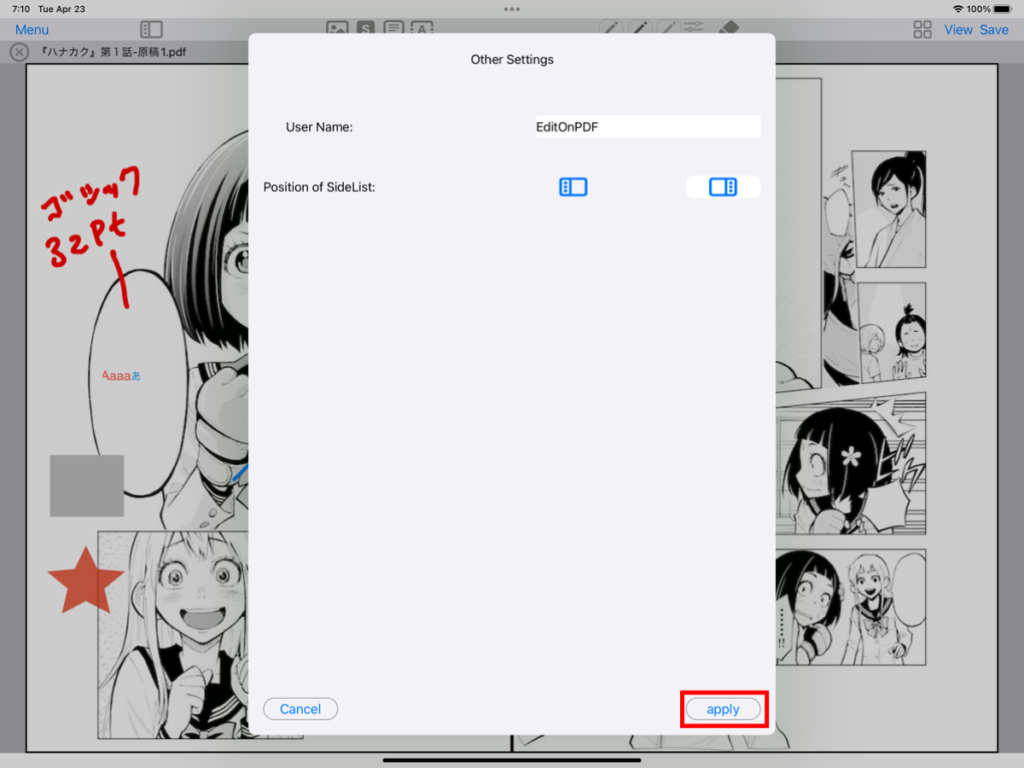
Once selected, touch “Apply”.
When you redisplay the annotation list, the display position will be changed to the set position.

Increase or Decrease the margins
Touch “Menu” and select “Modify Margins” .

When the settings screen appears, set the increase or decrease of the top, bottom, left, and right margins. Touch the value to change the settings .
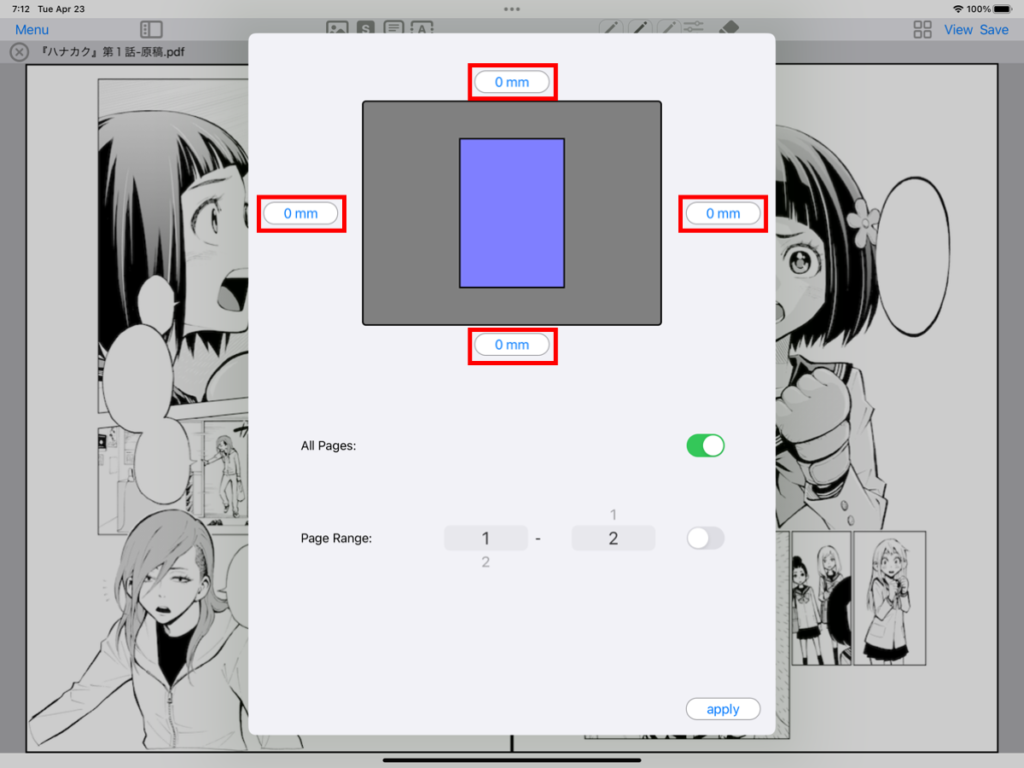
When you touch a number, a numeric keypad will appear. Set the value using the numeric keypad .
- “AC”: All clear. Set the number to zero.
- “+/-“: Switch between plus and minus
- “DEL”: Delete the last digit
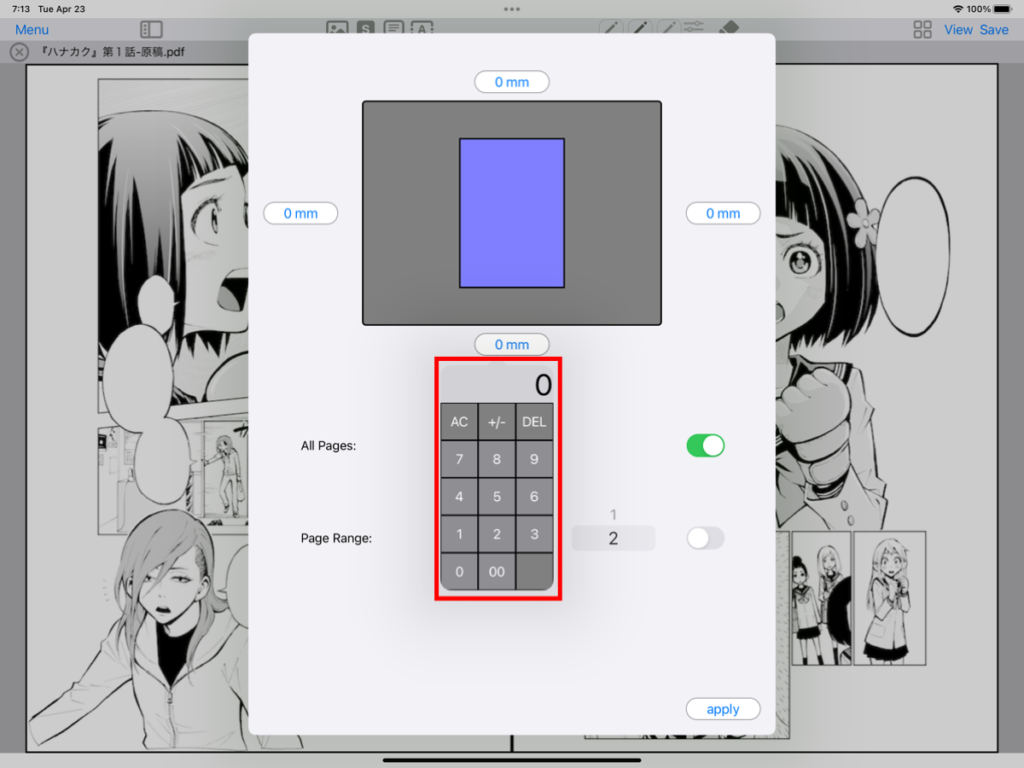
Set the target page to increase or decrease the margins. When the settings are complete, touch “Apply”.
- “All pages”: Increase or decrease the margins for all pages.
- “Page Range”: Increase or decrease the margins for the set page range.

The margins will be increased or decreased for the target page.
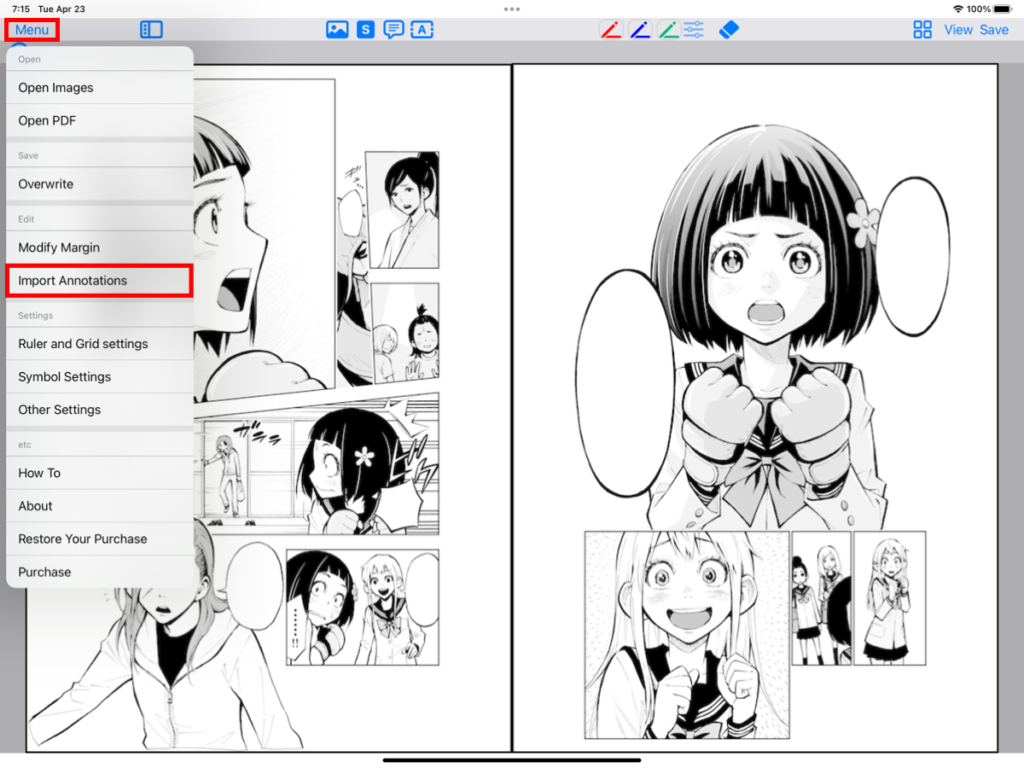
Import annotations (requires standard plan or higher)
Touch “Menu” and select “Import Annotations” .
When the file selection screen appears, touch the PDF with the annotations you want to import .

The results of checking whether the “comments included in the existing PDF” and “comments included in the selected PDF file” match are displayed.
- “Page”: Page number
- “New”: Number of annotations that do not exist in the existing PDF
- “Existing”: Number of annotations that match existing PDFs
At this time, if you touch “Preview”, you can display the imported annotations that are determined to be “new” as a preview.
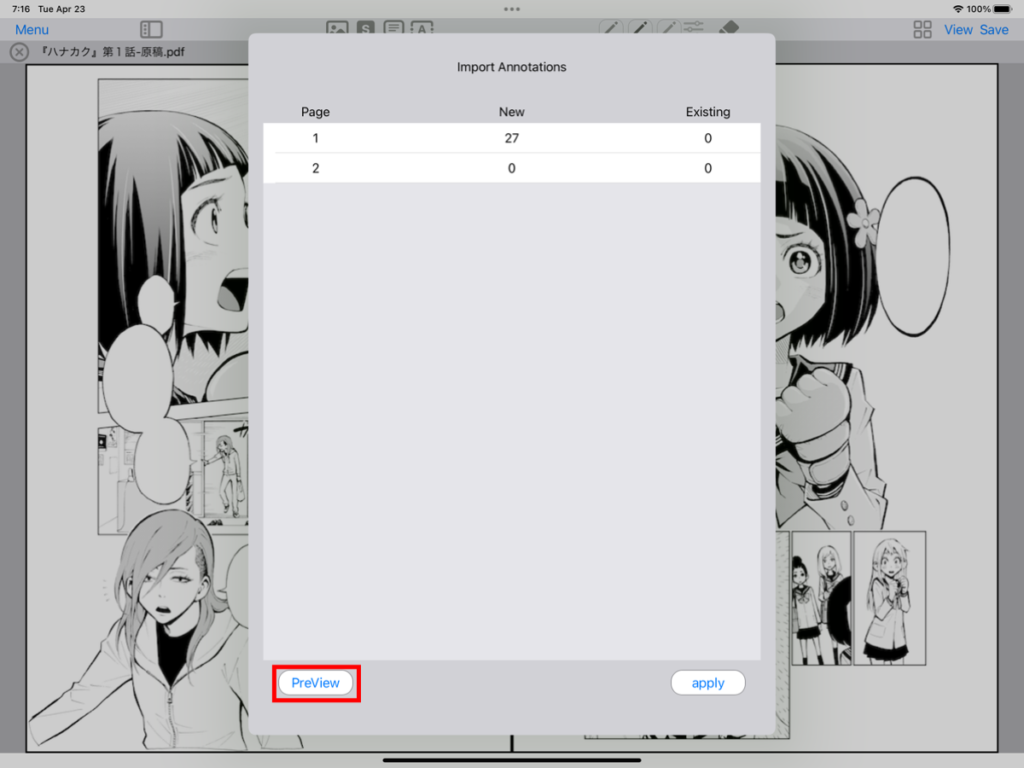
You can page preview by swiping up and down. To close the preview, tap “Close”.

If you want to import new annotations, touch “Apply”.
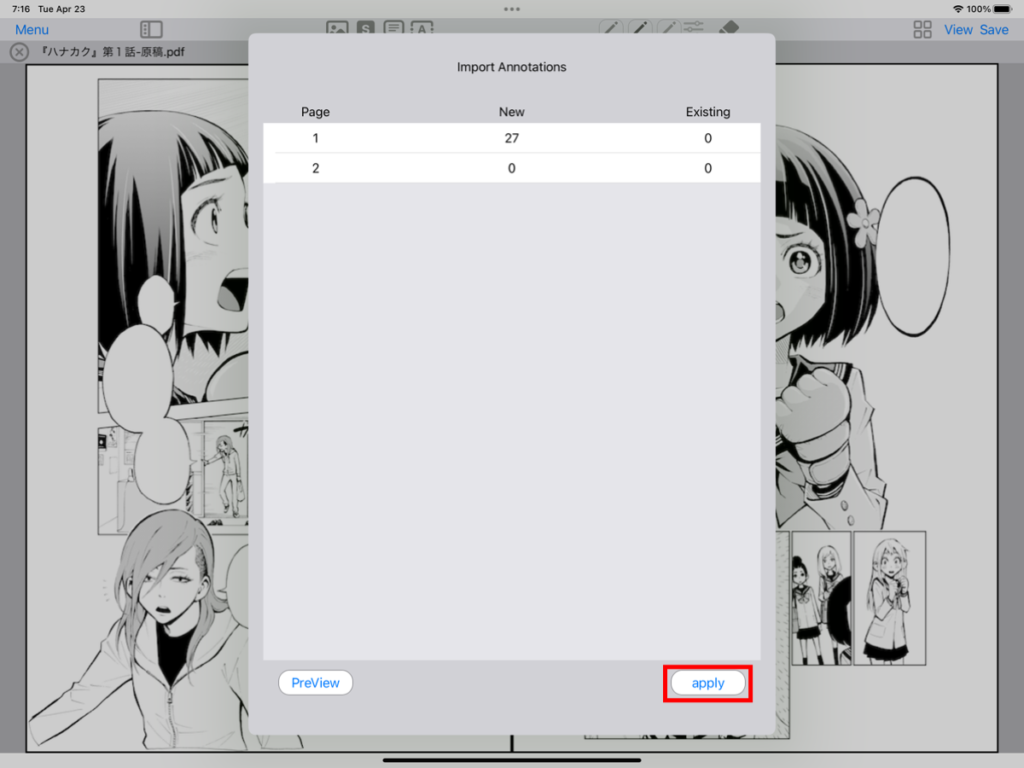
“New” annotations are imported.

Write with Apple Pencil
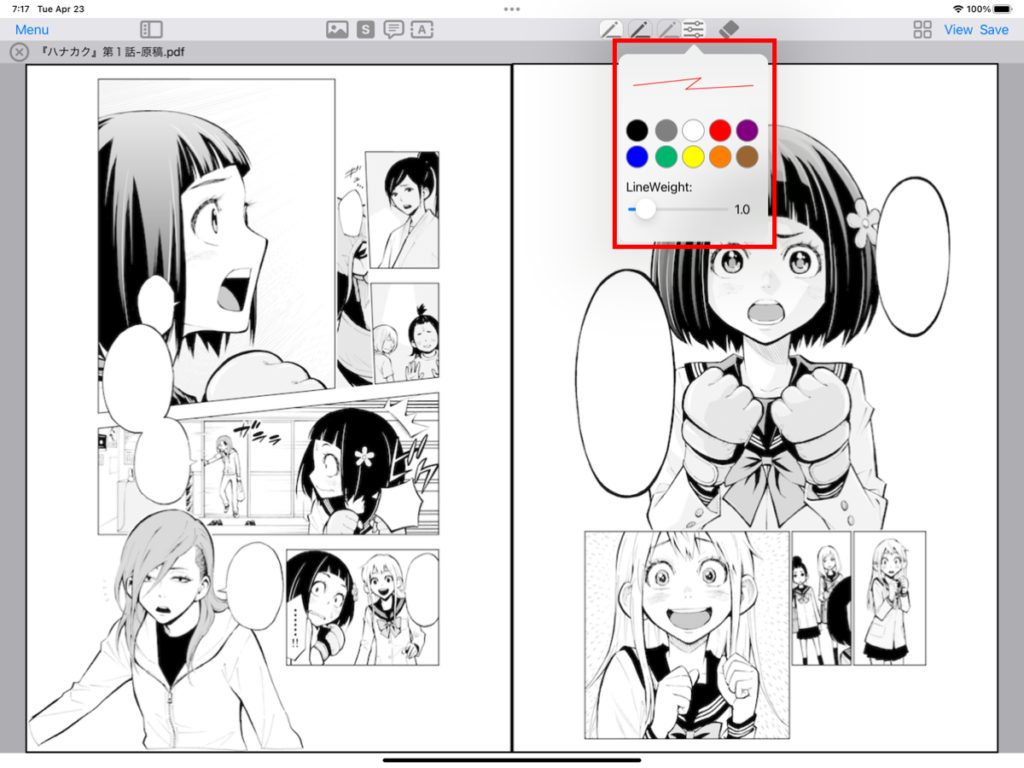
Touch one of the three pens at the top center.

The background color of the icon of the selected pen changes .If you want to change the pen color or line width, touch “Setting” .
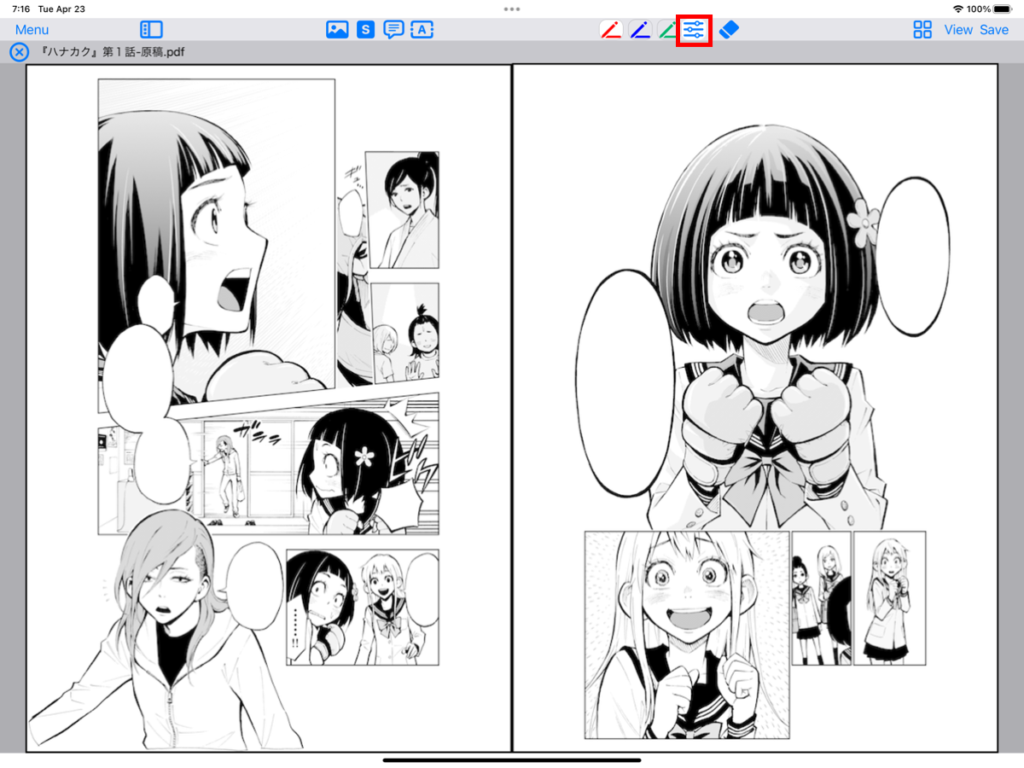
The settings view will be displayed, so change the color and line width.
Erase annotations written using the “eraser”
Touch the “eraser tool” to the right of the pen tool .

Use your Apple Pencil to “touch” or rub the annotation you want to erase like a real eraser.
Note: Only data written as annotation data can be erased. It is not possible to erase part or all of a picture embedded as an image.
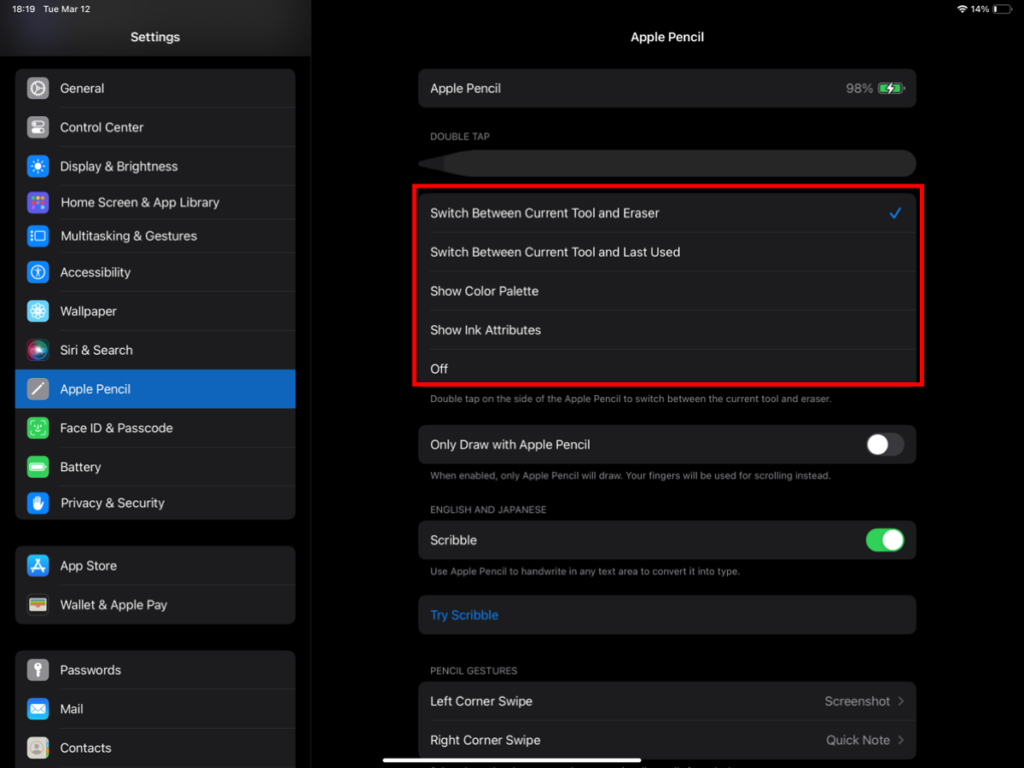
Switch tools with a double tap on Apple Pencil
Select “Settings > Apple Pencil”. From the double tap item, select the process you want to perform when double tapping.
Paste an image as an annotation
Touch “Image Annotation” .
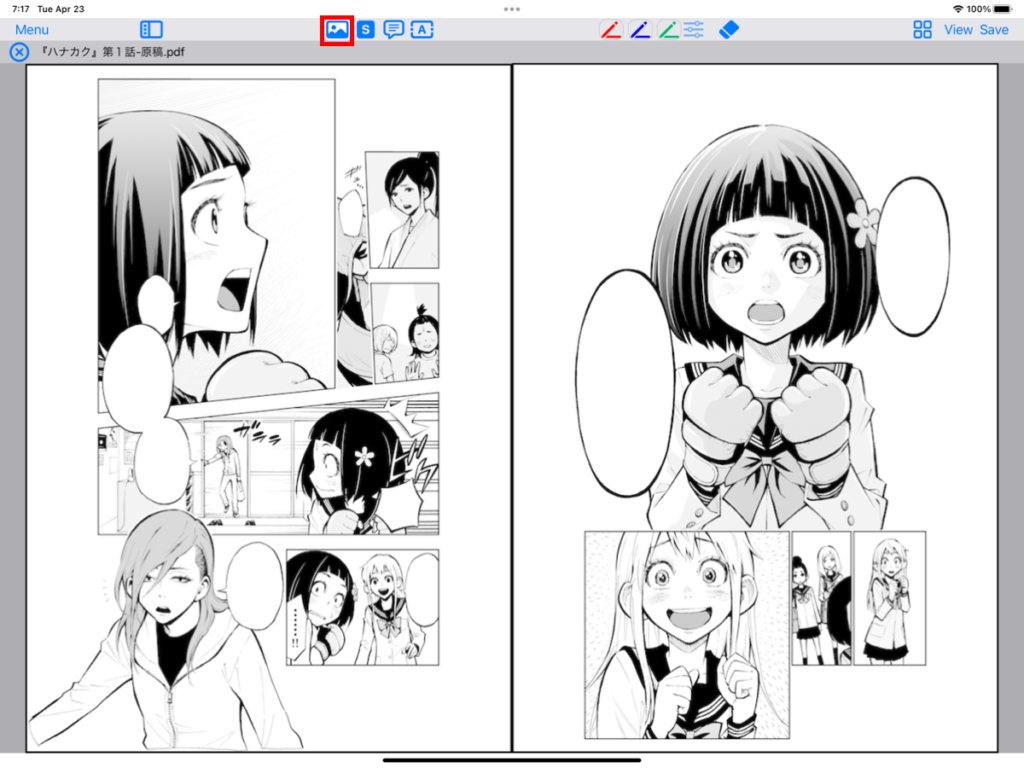
Touch the location where you want to paste the image annotation with Apple Pencil.
When a pop-up appears asking you to select the source of the image data, select the source. Let’s select “Camera Roll” here.

When the screen to select an image from the camera roll appears, touch the image file you want to paste.
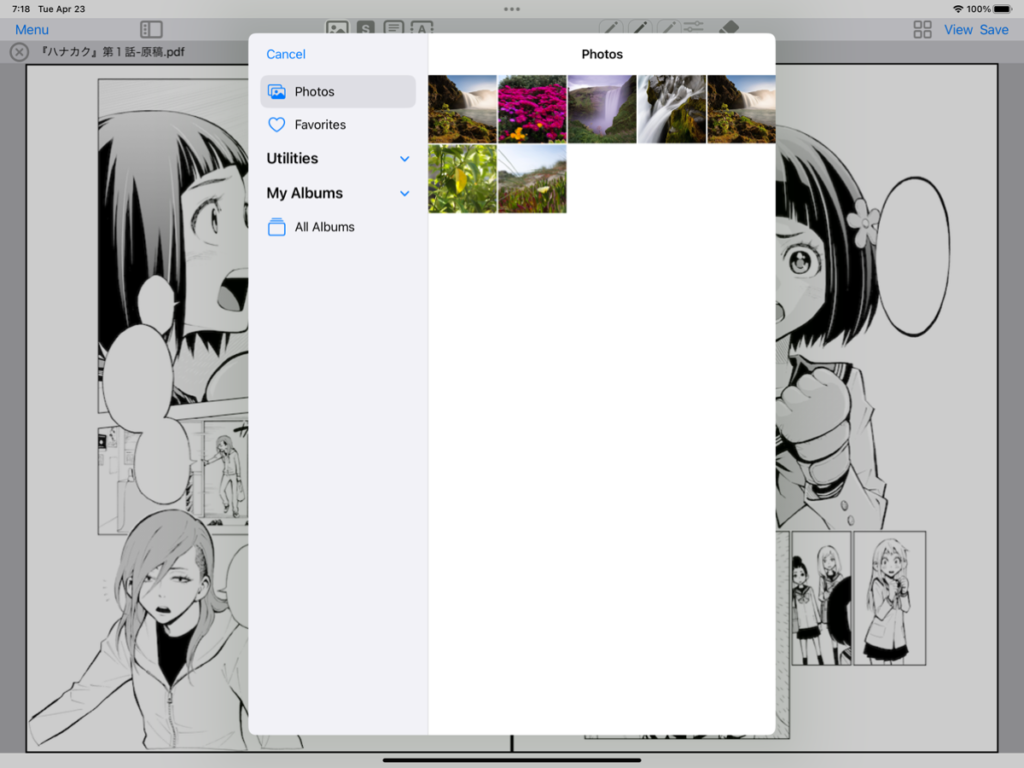
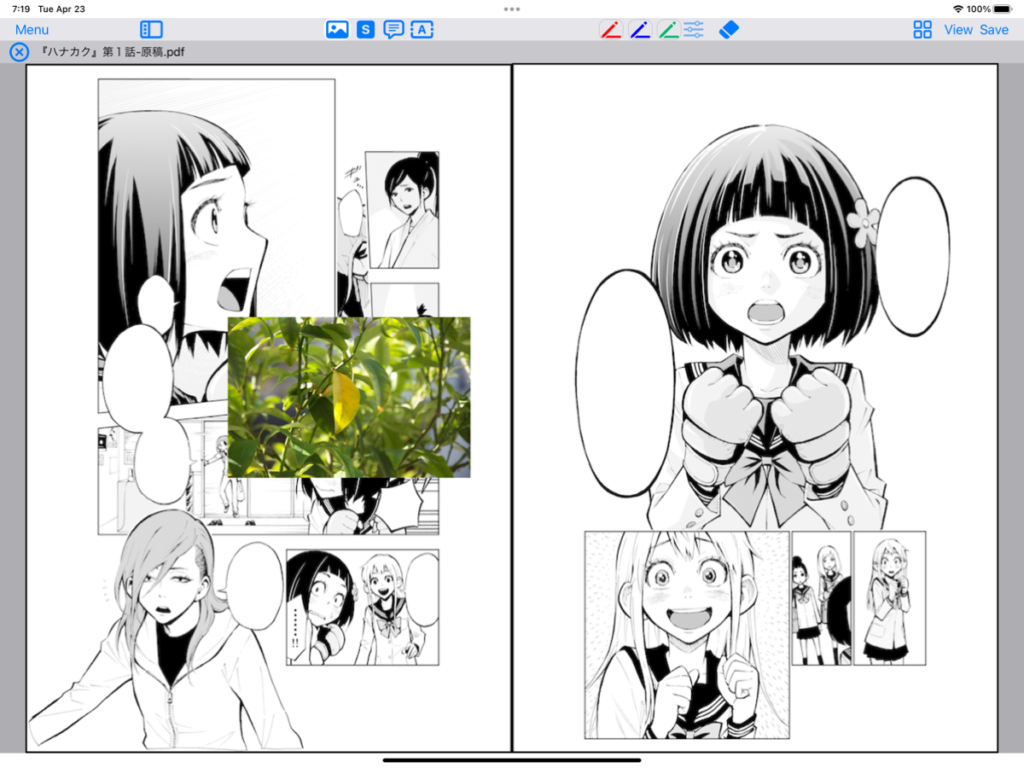
The selected image is pasted as an annotation on the page.
If you want to select image data from a file, select “From file” in the pop-up for selecting the image data source.
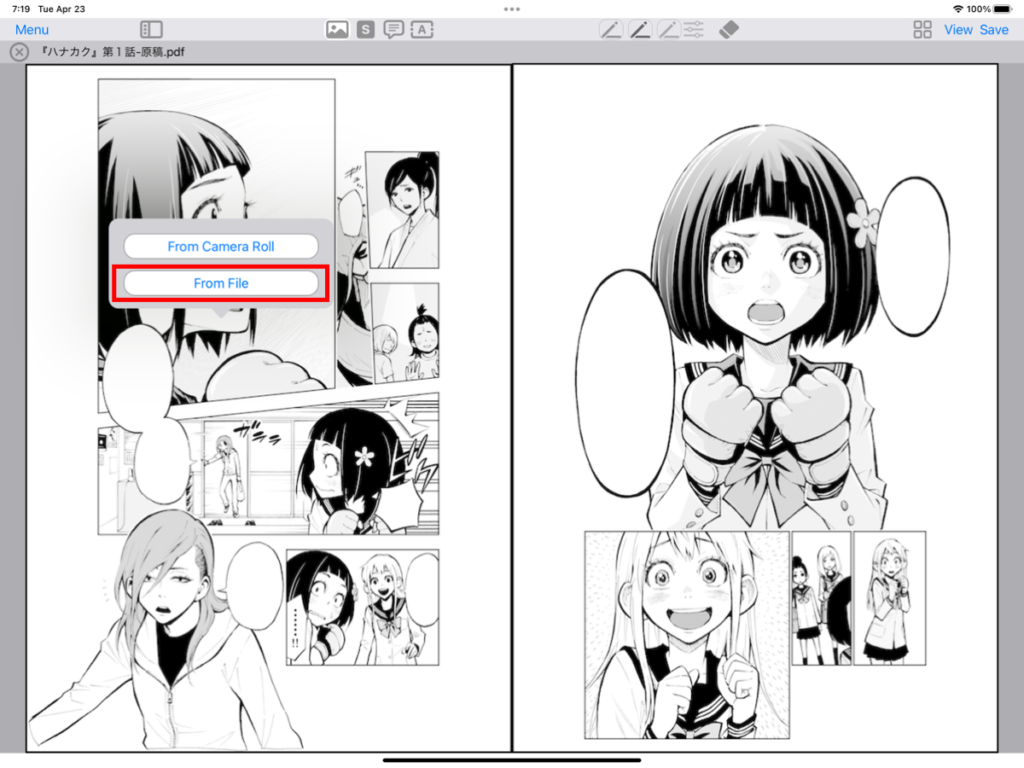
When the Select File screen appears, touch the image file you want to paste .

The selected image is pasted as an annotation on the page .

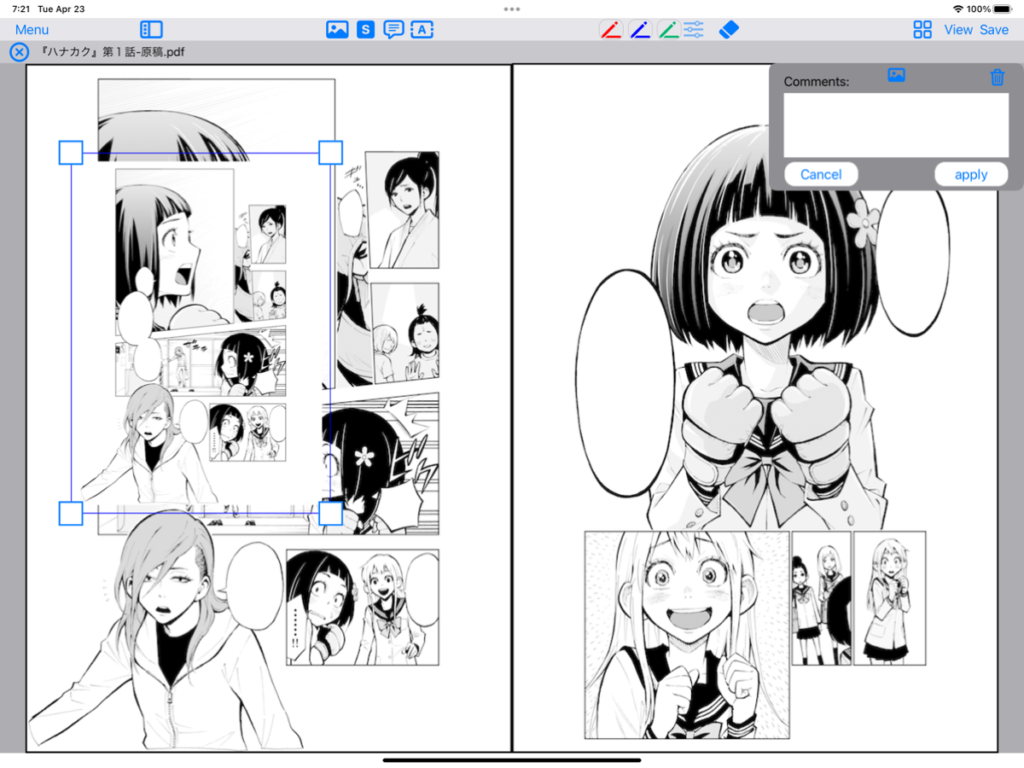
Moving annotations
When you tap the annotation you want to move , a frame will appear to indicate its selection status.
You can move the annotation by touching and moving the center of the frame .
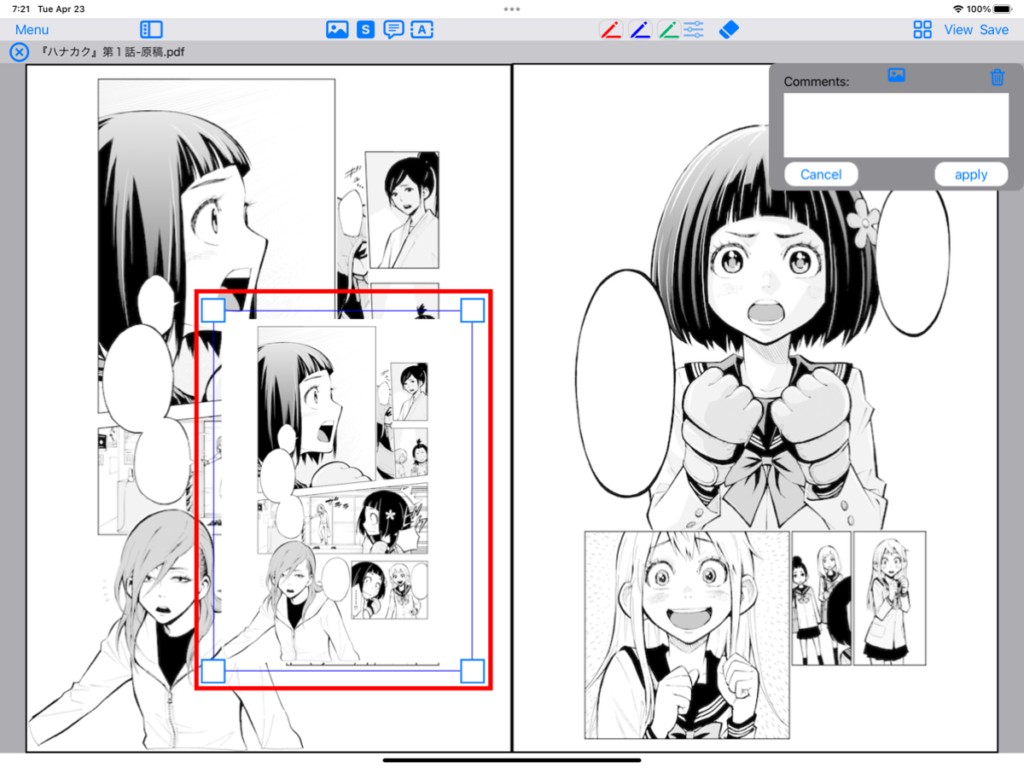
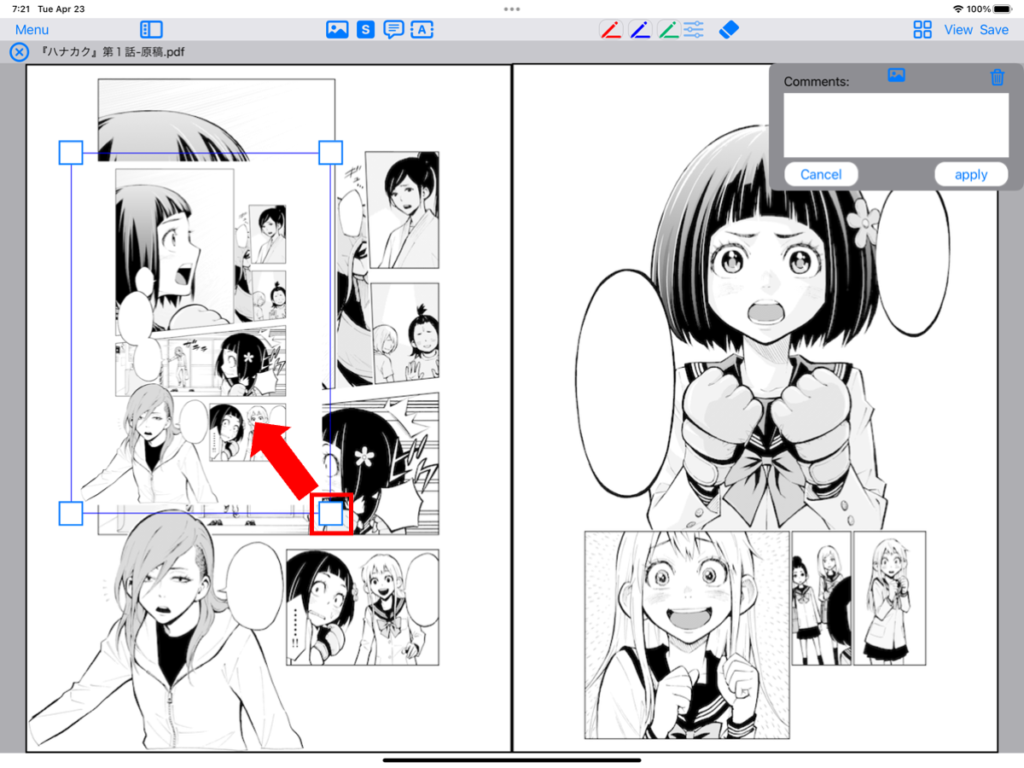
Resize annotations
If there are square marks in the four corners of the frame that appears when you tap an annotation , you can change its size. If you want to make the annotation smaller, touch the square mark and move it in the direction of making it smaller. (If you want to make it bigger, move it in the opposite direction.)

Use proofreading symbols
Select and paste proofreading symbols
Touch “Symbol Tool” .

A list of proofreading symbols will be displayed. If you keep touching the proofreading symbol you want to paste , it will become a little larger.
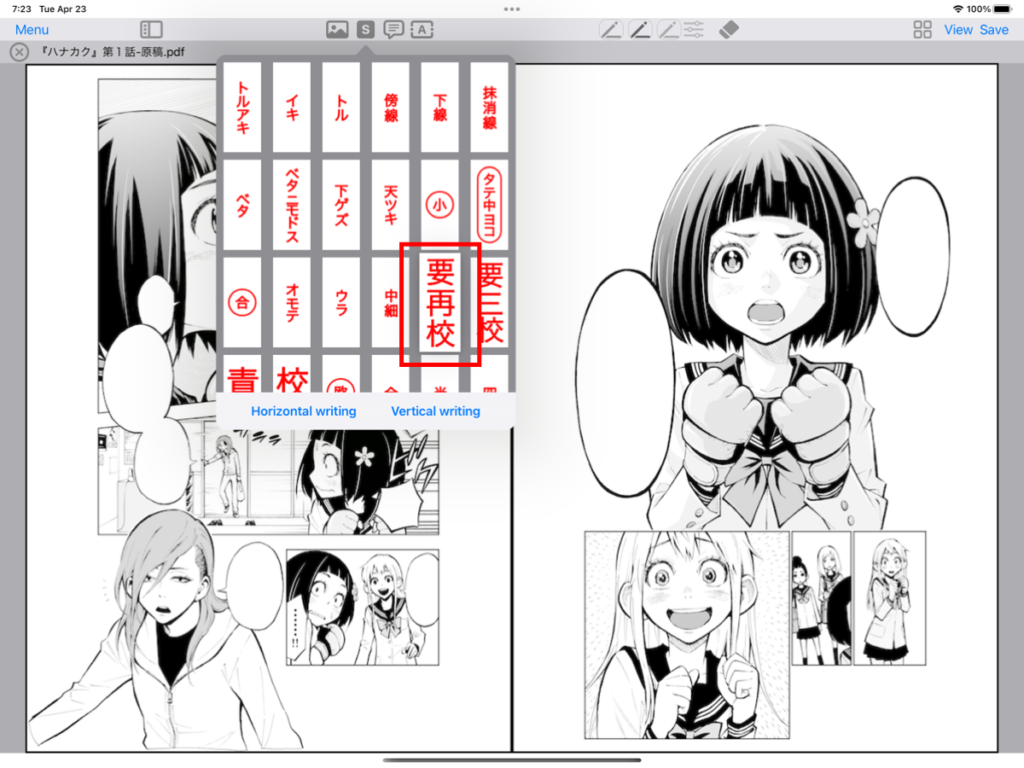
Drag and drop it to where you want to paste it (touch and move, then release).
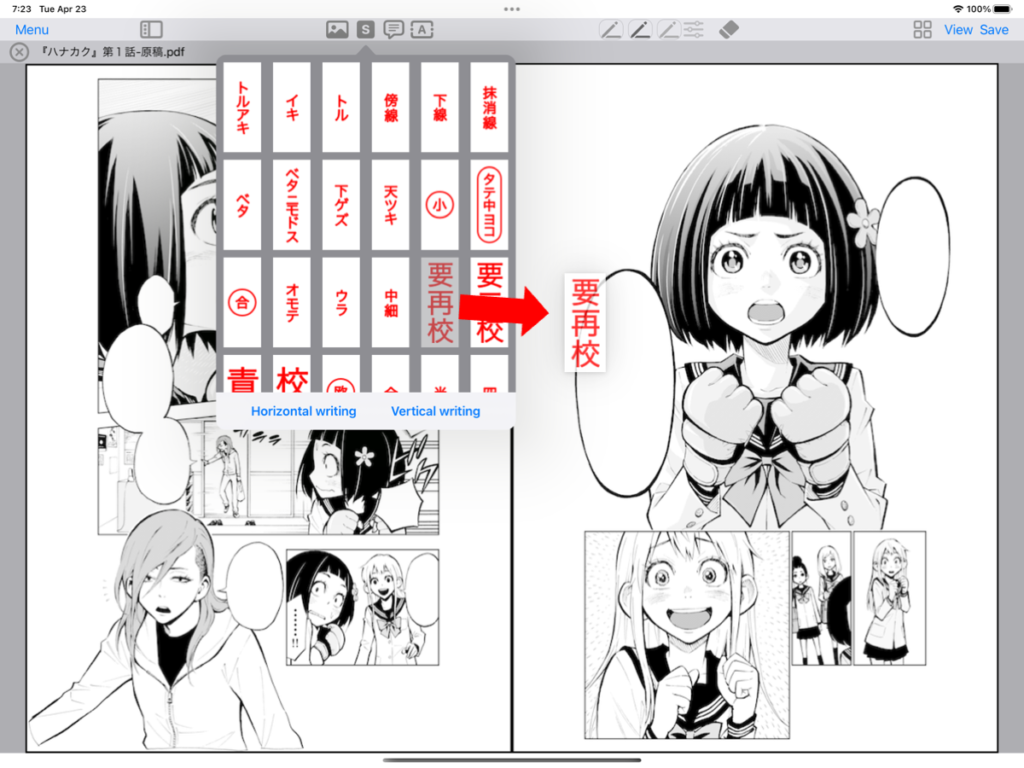
The proofreading symbol is pasted as an image annotation where you drop it.
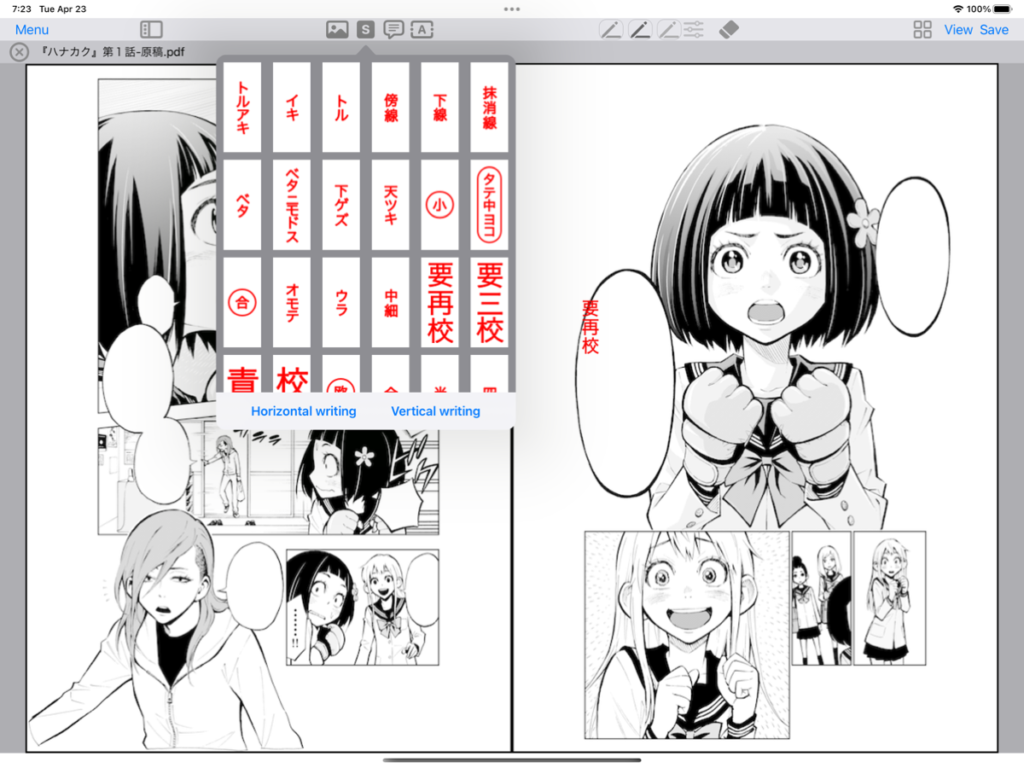
Switch between “vertical writing” and “horizontal writing” symbols
A list of proofreading symbols will be displayed. If you want to change from the “Horizontal writing” symbol to the “Vertical writing” symbol, touch “Vertical writing” .

If you want to change to “Horizontal writing” again , touch “Horizontal writing” .

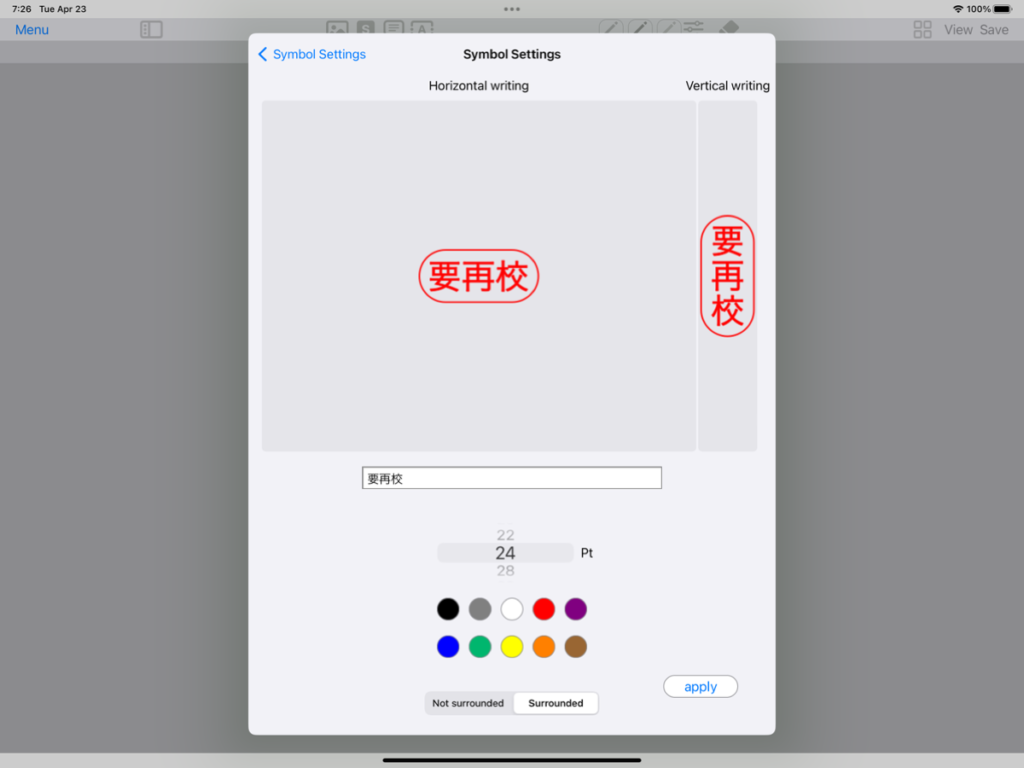
Change proofreding symbols (text (requires Standard plan or higher), color, size, border)
Touch “Menu” and select “Symbol settings” .

When the registered symbols are listed, select the symbol you want to change .
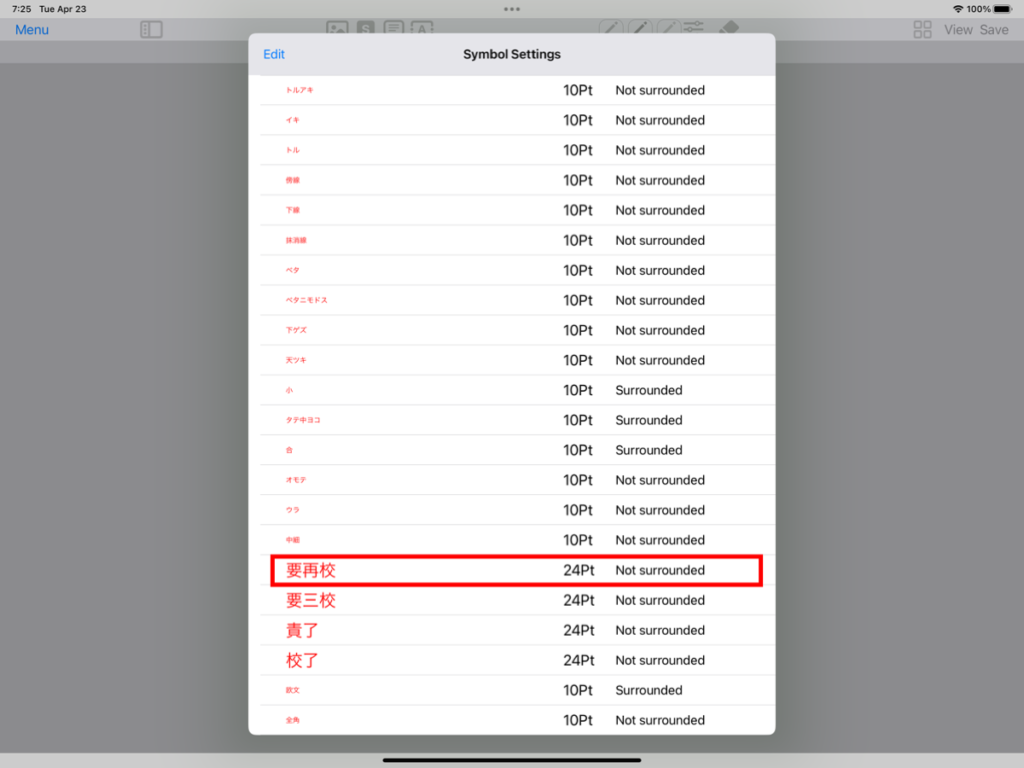
- Change text (Standard plan or higher required): You can edit the text you want to display.
- Select font size: You can change the font size when pasting as an image annotation.
- Select font color: You can change the font color.
- Select a frame: You can choose whether to surround the text with a frame.
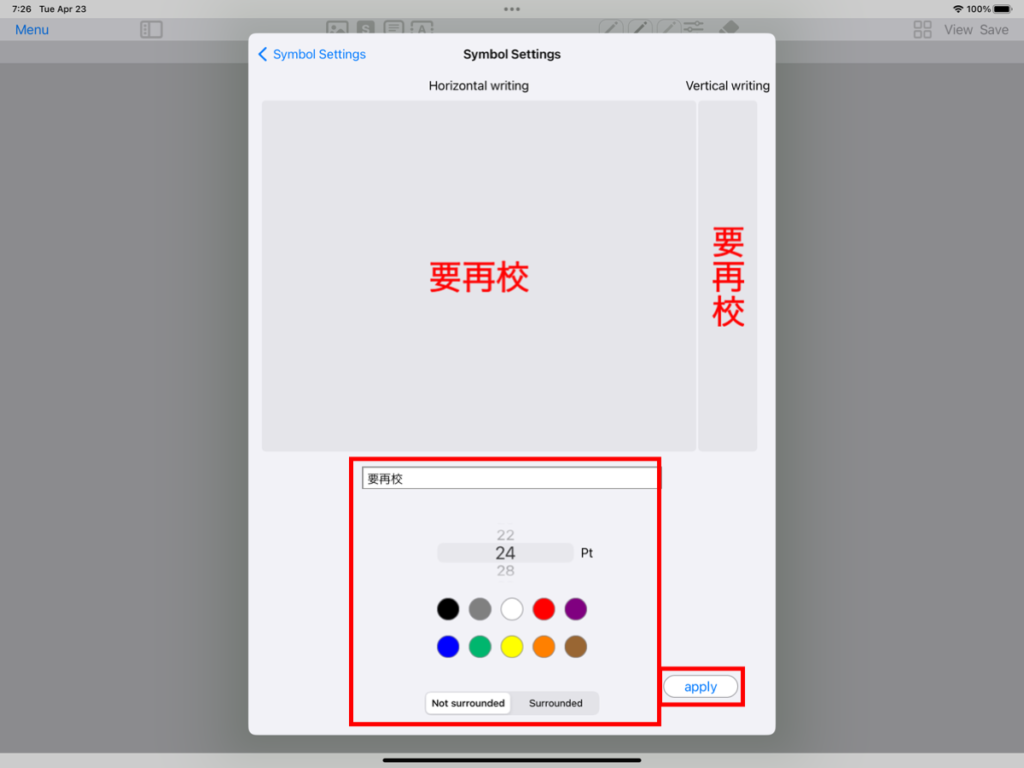
The preview will update as you change settings.
Change the display order of symbols
Change the order of the “symbols” that are displayed when the “symbol tool” is selected.
Touch “Menu” and select “Symbol settings” .
When the registered symbols are listed, select “Edit” at the top left .

Once you are in edit mode, touch and drag the “three-line icon” on the right end of the file name . When you have finished changing the order, touch “Edit Off” at the top left to exit editing mode.

Paste text annotations
Touch “Text Annotation”.

Touch the location where you want to paste the text annotation with Apple Pencil.
When the screen for entering text appears, touch the input area to enable text entry, then enter the text.
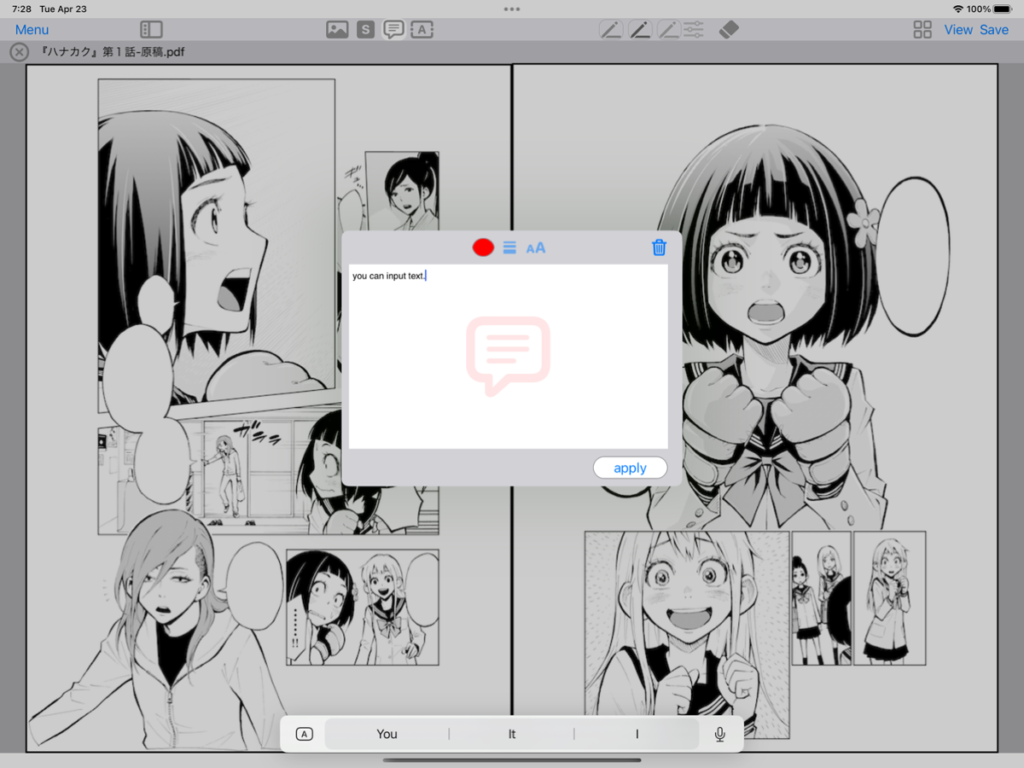
Text annotations appear on the page as a “speech bubble” icon. To change the icon color, touch the color icon.
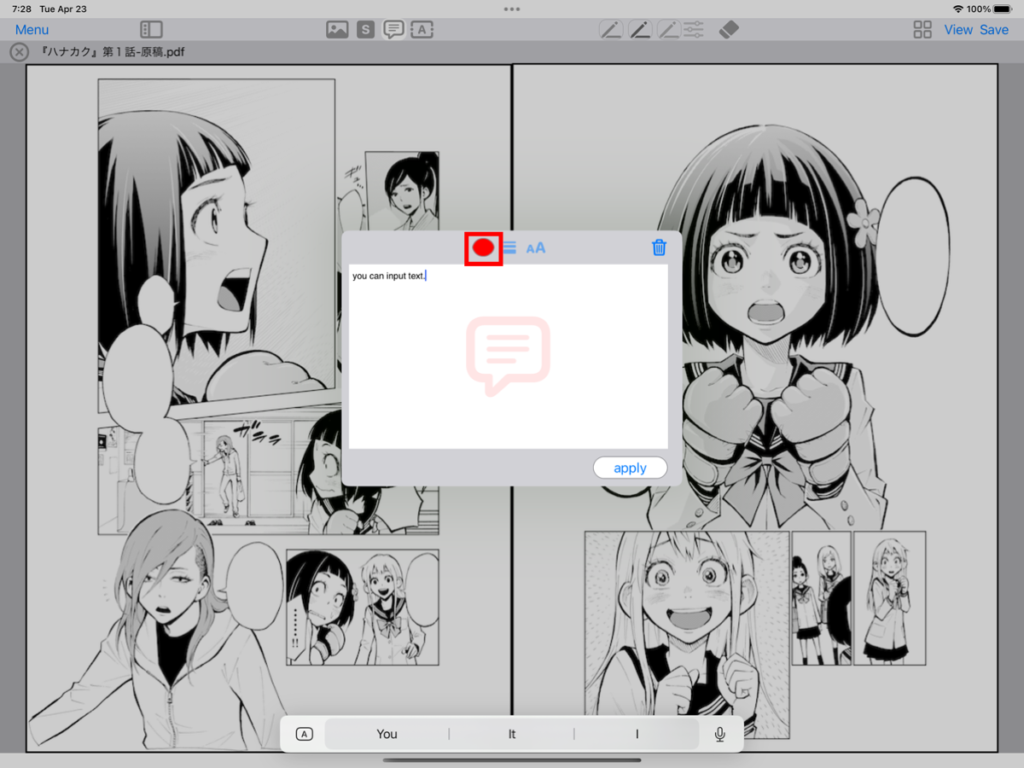
When the color palette appears, tap a color to select it.

The icon color will change. Once you have entered the icon color and text, tap “Apply”.
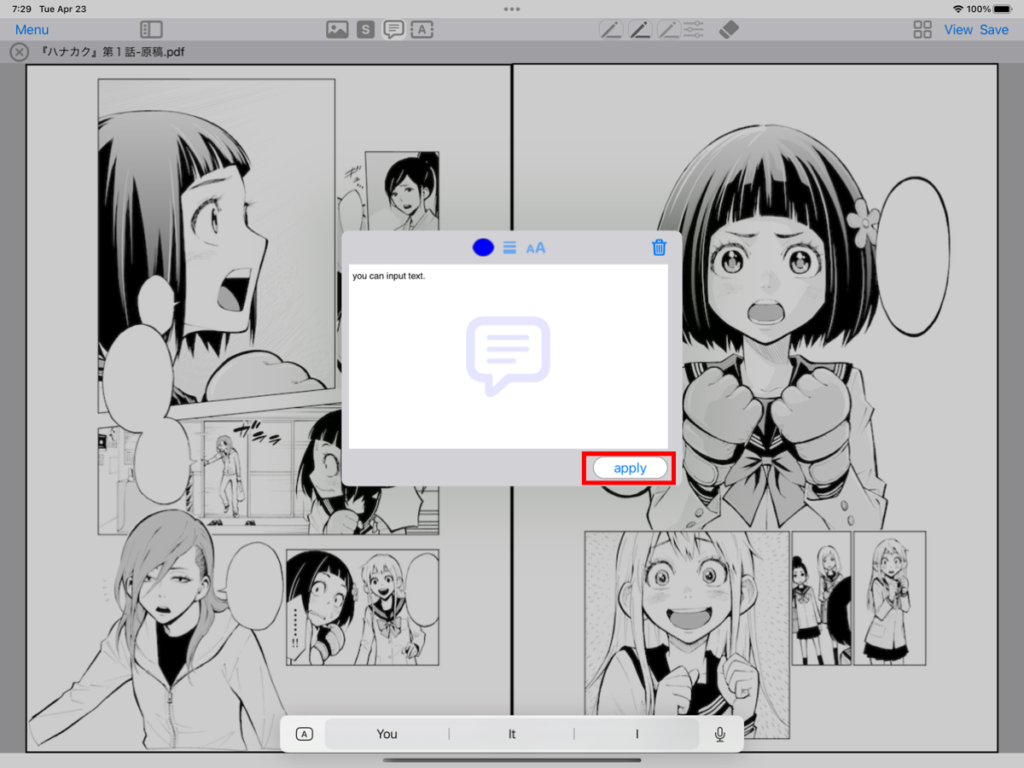
Pasted onto the page as a text annotation.

Paste free text annotations
Touch “Free Text Annotation”.
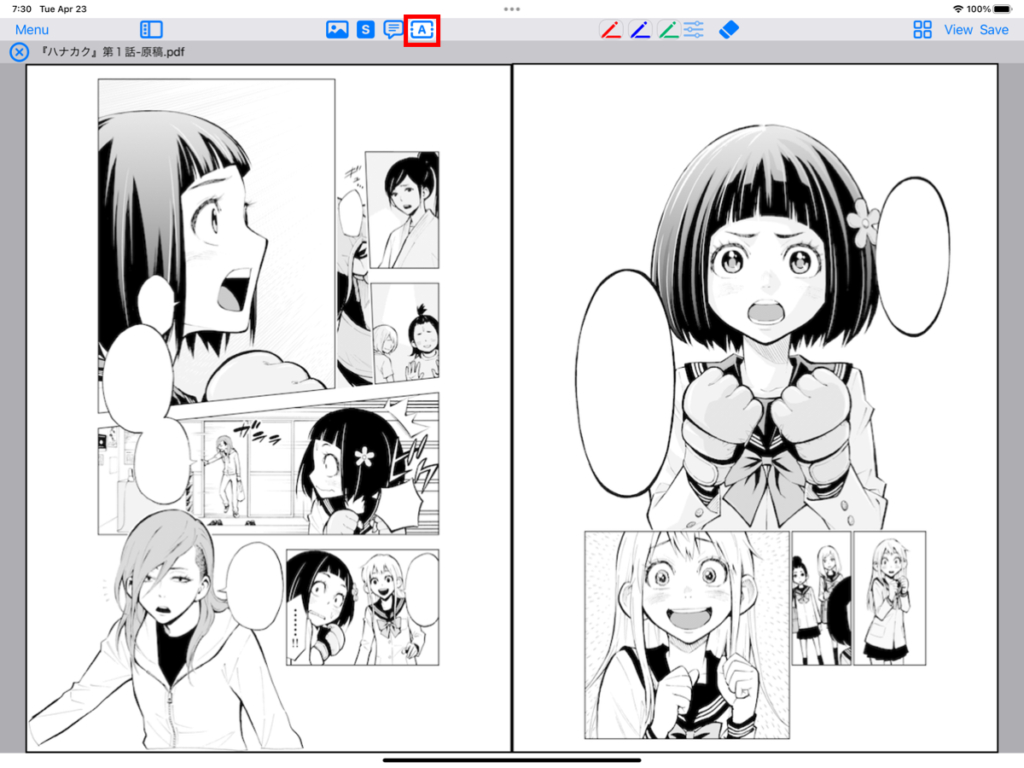
Touch the location where you want to paste the free text annotation with Apple Pencil.
When the screen for entering text appears, touch the input area to enable text entry, then enter the text.

If you want to change the text color, touch the color icon.
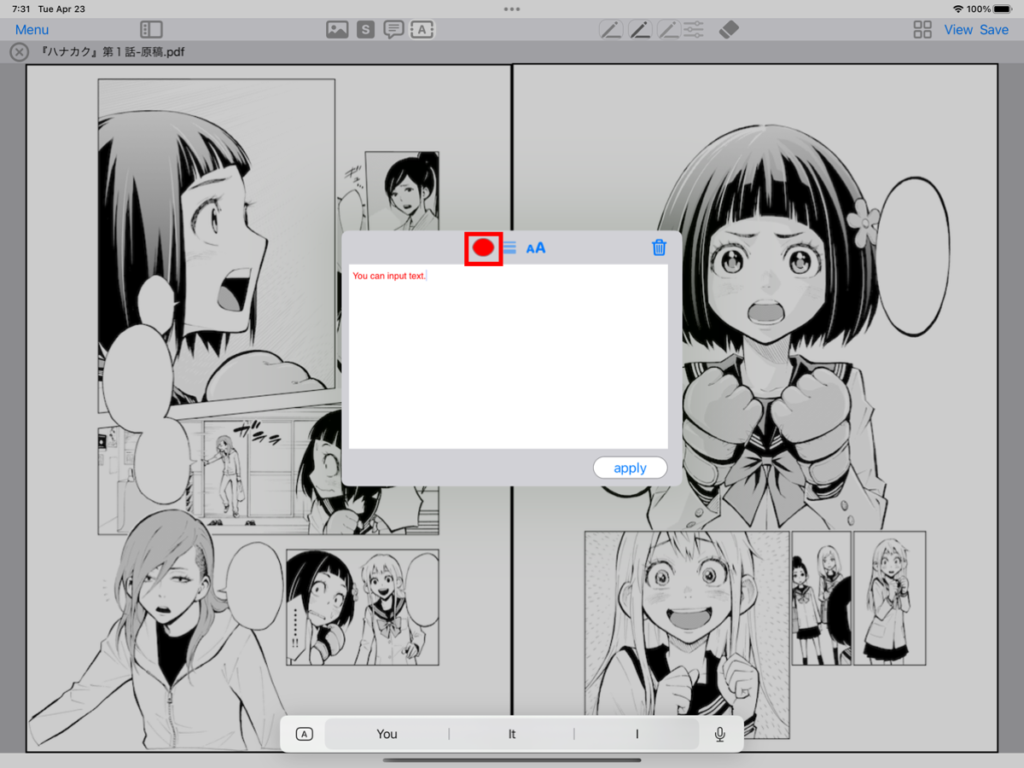
When the color palette appears, tap a color to select it.

The text color will change.

If you want to change the font size of the text, touch the size.

When the text size slider appears, move the slider to select the text size.

The text size will change. Once you have set the text color and size, tap “Apply”.

Pasted onto the page as a free text annotation .

Save PDF file
If you want to save the edited PDF, touch “Save” at the top right . Save overwrites the opened PDF file .
Note: Automatic saving is not supported. We recommend that you save your work regularly to avoid losing your work.
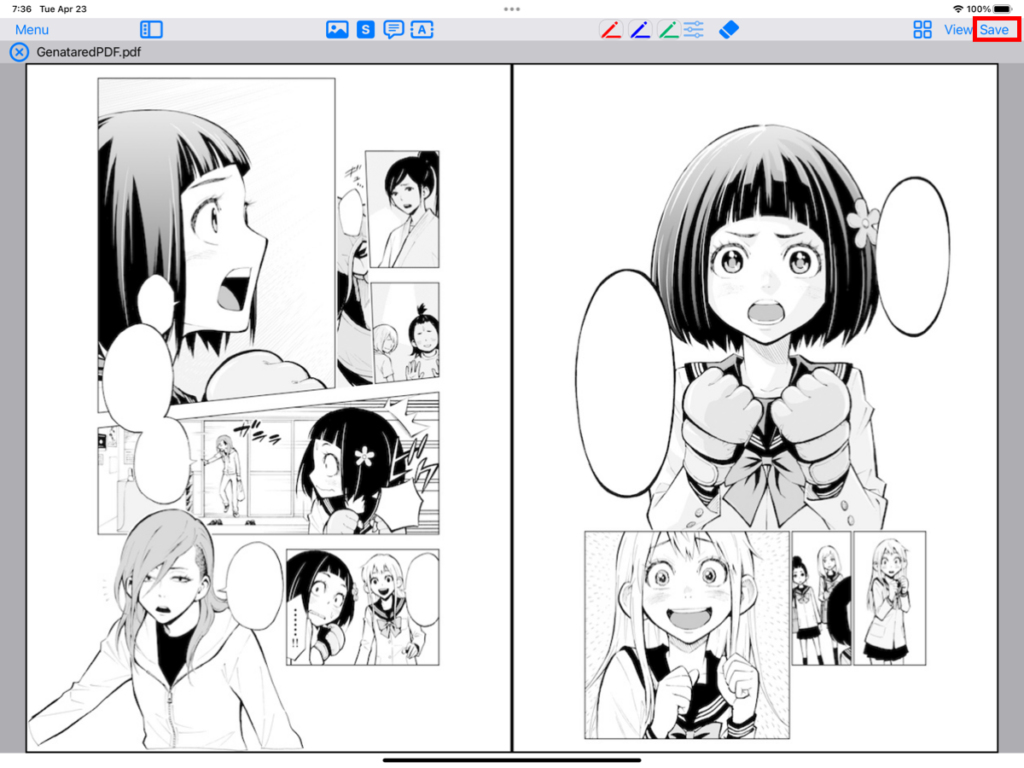
If you have generated a PDF from an image, a view will be displayed to select the save destination .
If you want to change the file name, edit the file name at the bottom of this screen .
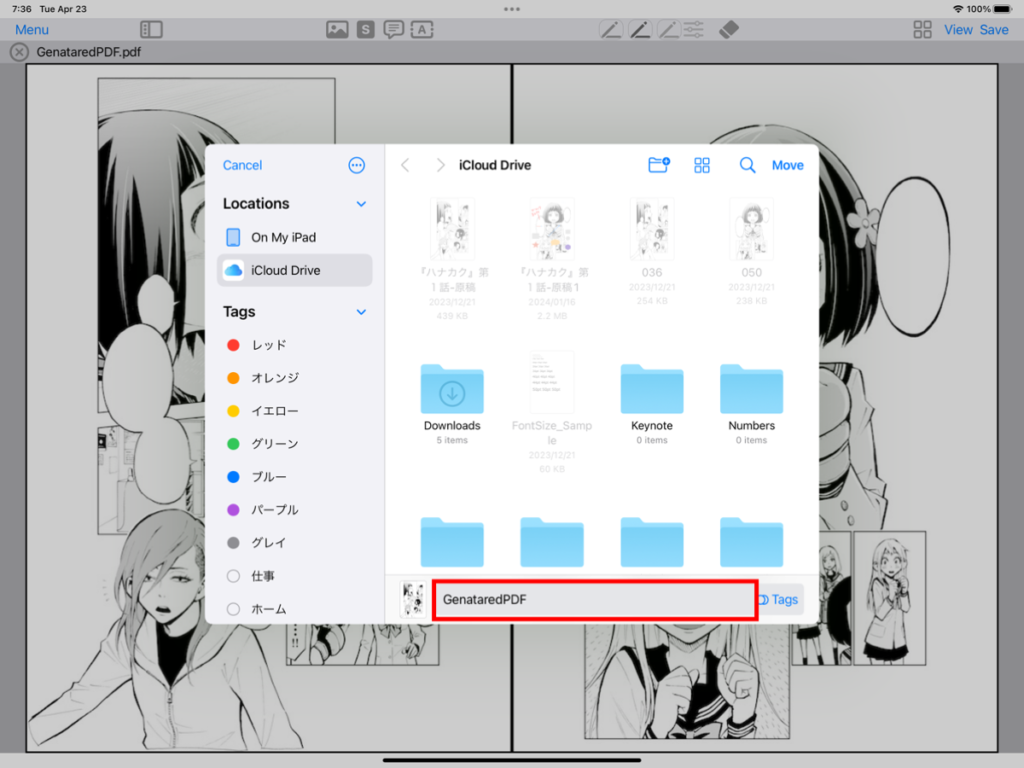
ouch to move to the save destination folder and touch “Move” in the upper right .
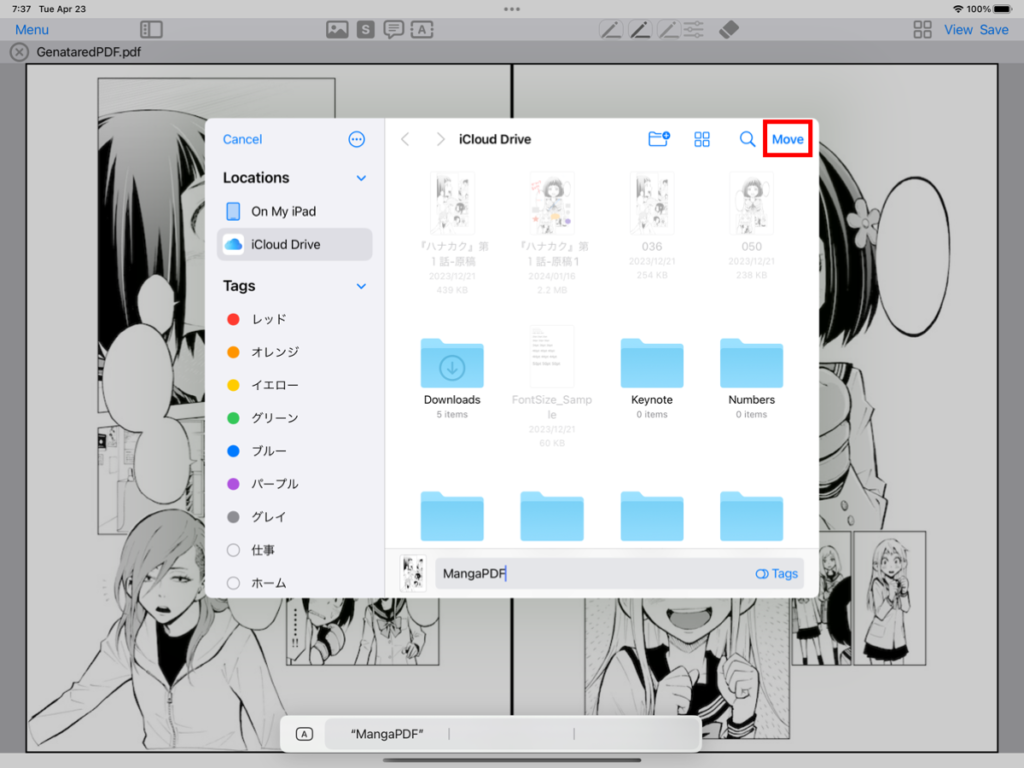
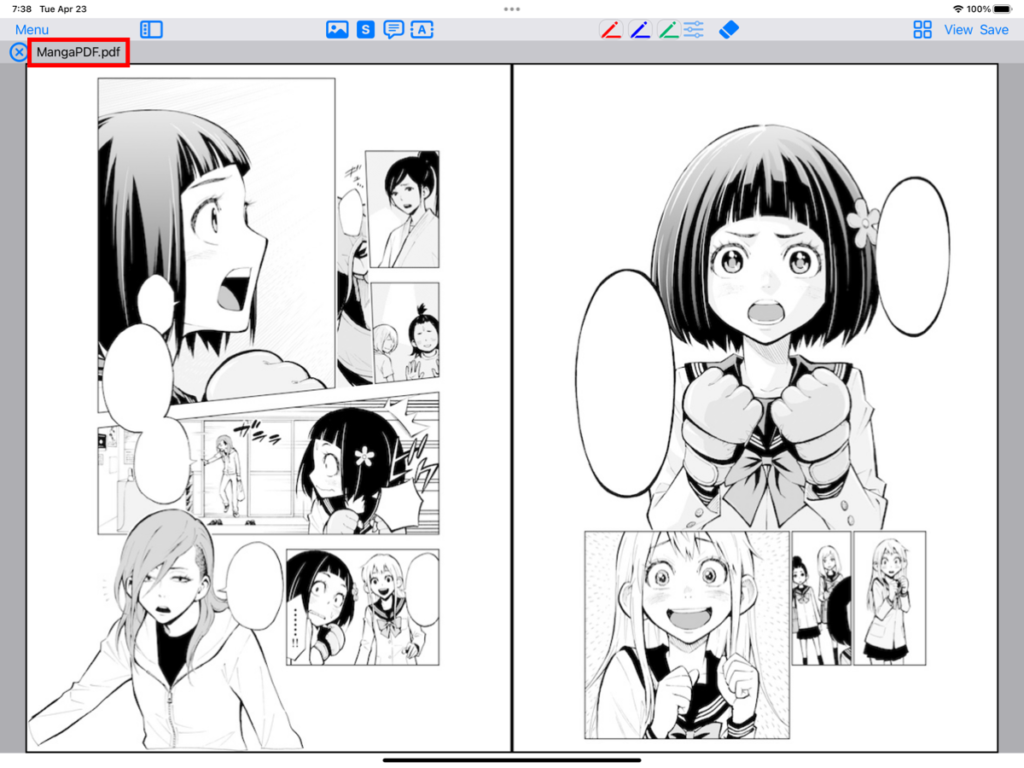
When the save process is complete and you return to the first screen, you will see that the file name has been changed.
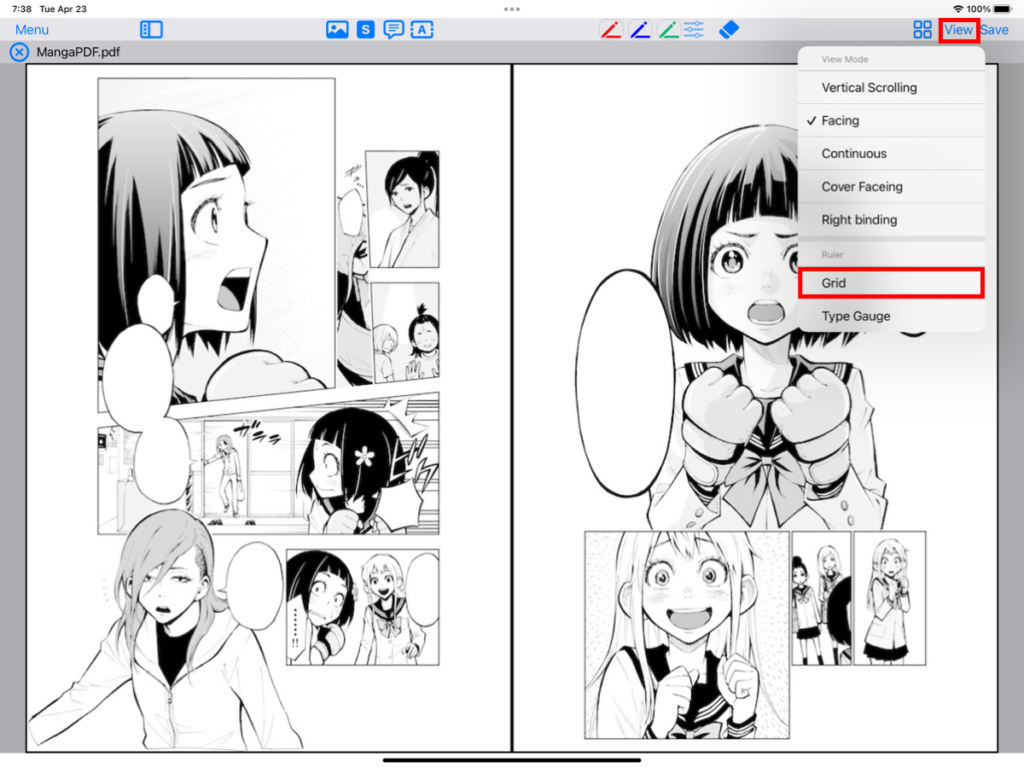
Show ruler
Show grid
Touch and check “Grid” from the “View” menu to display the grid. If you want to erase the grid, touch “Grid” again from the “View” menu and uncheck it .
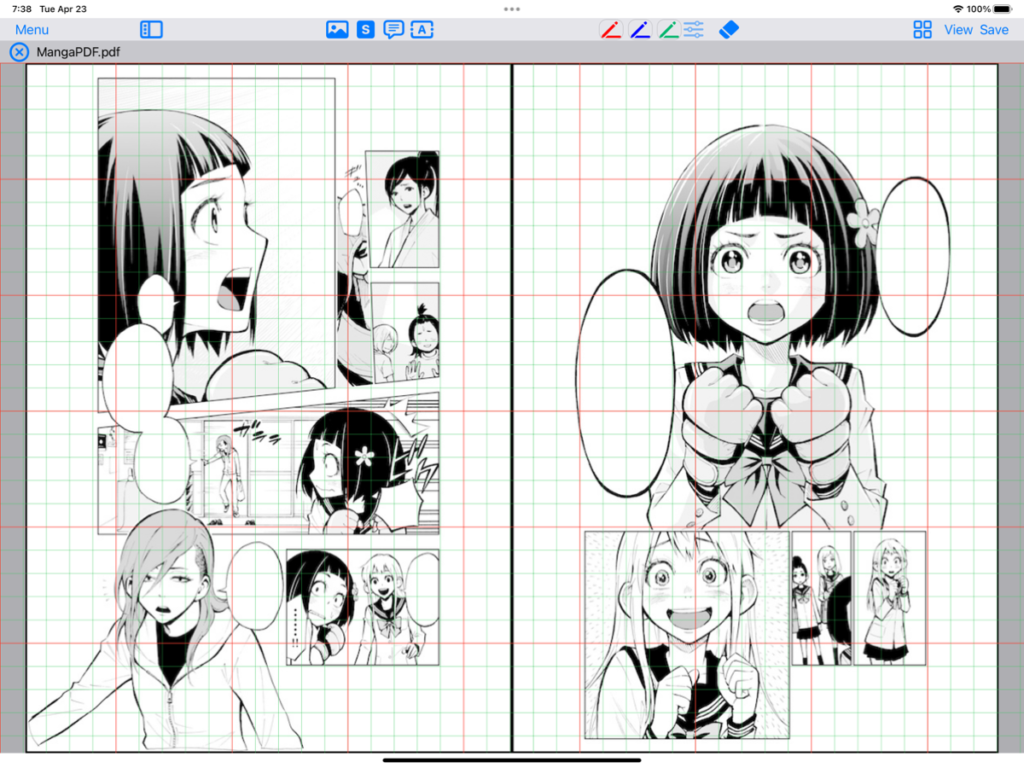
Change grid display settings
If you want to change the grid color or spacing, touch “View” in the top right and select “ruler settings“.

The “Settings” View will be displayed. There are two types of grids: Main Grid and Sub Grifd, and you can change the “interval”, “color”, “line width”, and “line type” for each .

If you want to change the main line of the grid, touch each item in “Main Grid” to change it.

If you want to change the sublines of the grid, touch each item in “sub Grid” to change it.

If the ruler size is different from the actual size ( the image size of the opened file is different from the actual size ), adjust the displayed ruler size. If set to less than 1.0, the ruler will be displayed smaller. If it is over 1.0, the ruler will be displayed larger.
note. This setting changes not only the “grid” display size but also the “type Gauge” display size
example. If the image size of the opened file is 1.2 times the actual size, set the ruler magnification to 1.2 times .
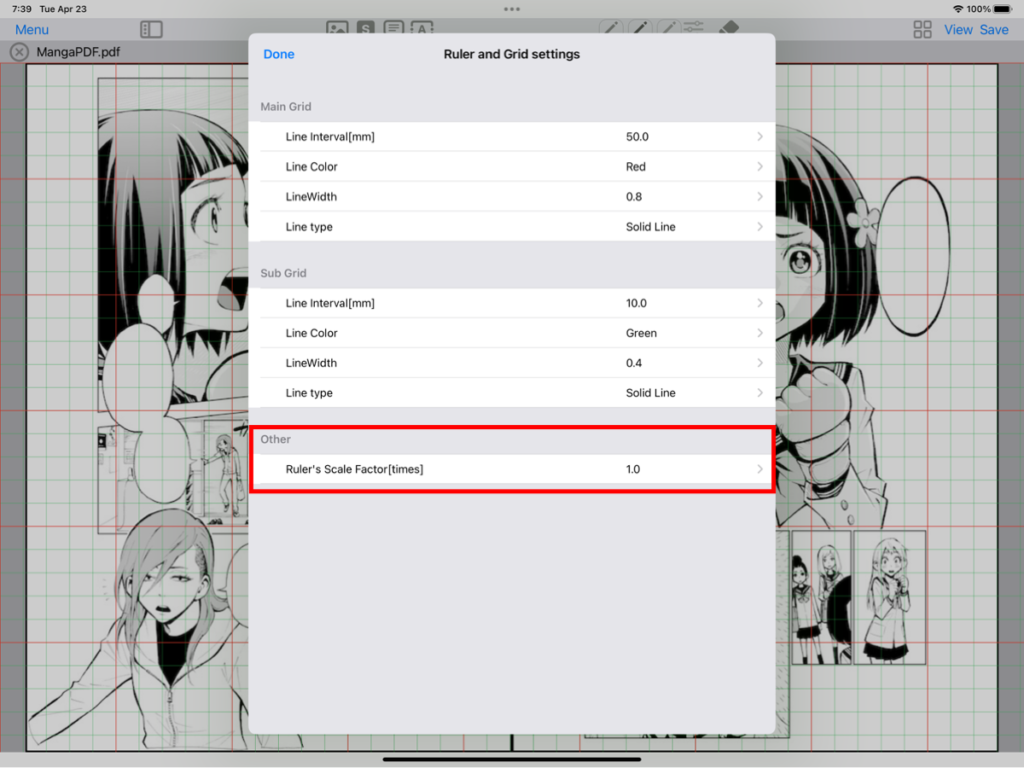
Finally, touch “Done” to apply the settings.

Show Type gauge
Select “Type gauge” from the “View” menu and turn it on. If you want to erase the series table, select “Tyepe gauge” from the “View” menu again and turn it off. Alternatively,you can erase the type gauge by touching the “X” mark at the top right of the tyepe gauge.


Rotate the series table (vertical/horizontal writing)
If you want to rotate the Type Gauge to accommodate “vertical writing” and “horizontal writing , ” touch “Rotate. “
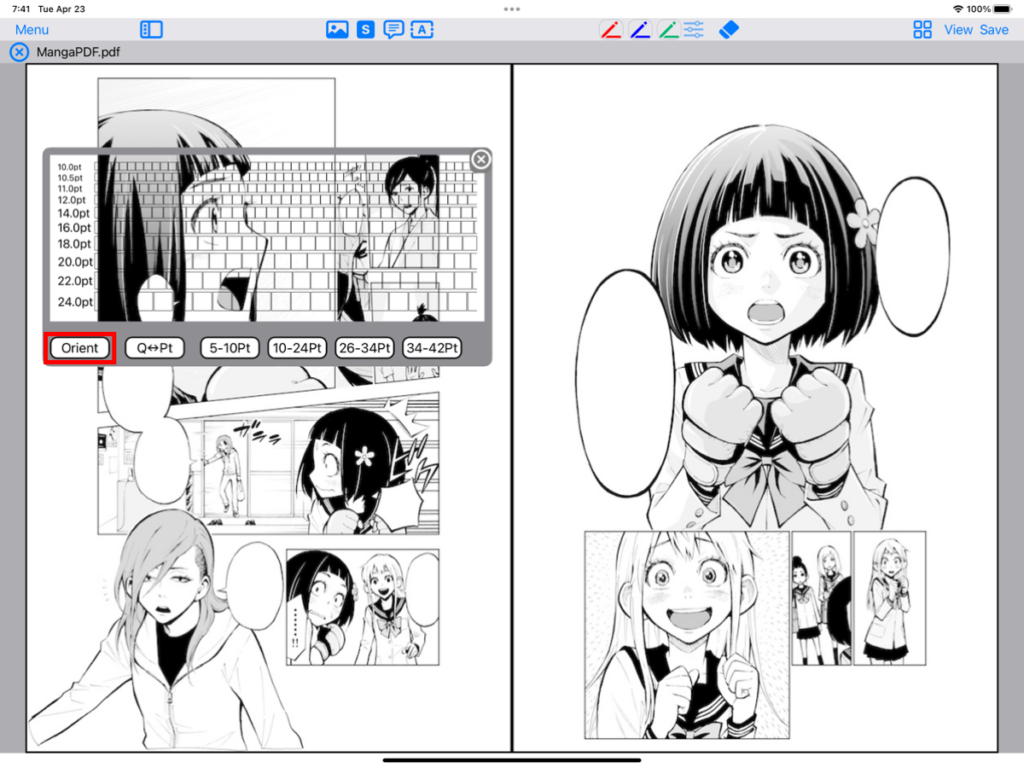
The Type Gauge will be rotated 90 degrees.

Changing the font size unit (Pt/Q)
If you want to switch the font size unit (“Pt” / “Q”), touch “Q↔︎Pt” .

The unit of font size changes.

Change the range of displayed gauge sizes
If you want to change the gauge size range, touch the button for each size range .

Adjust the size of the type table
If the size of the type Gauge is different from the actual size ( the image size of the opened file is different from the actual size ), adjust the size of the series table to be displayed. If set to less than 1.0, the ruler will be displayed smaller. If it is over 1.0, the ruler will be displayed larger.
note. This setting changes not only the “type Gauge” display size but also the grid” display size
example. If the image size of the opened file is 1.2 times the actual size, set the ruler magnification to 1.2 times .
Finally, touch “Done” to apply the settings.
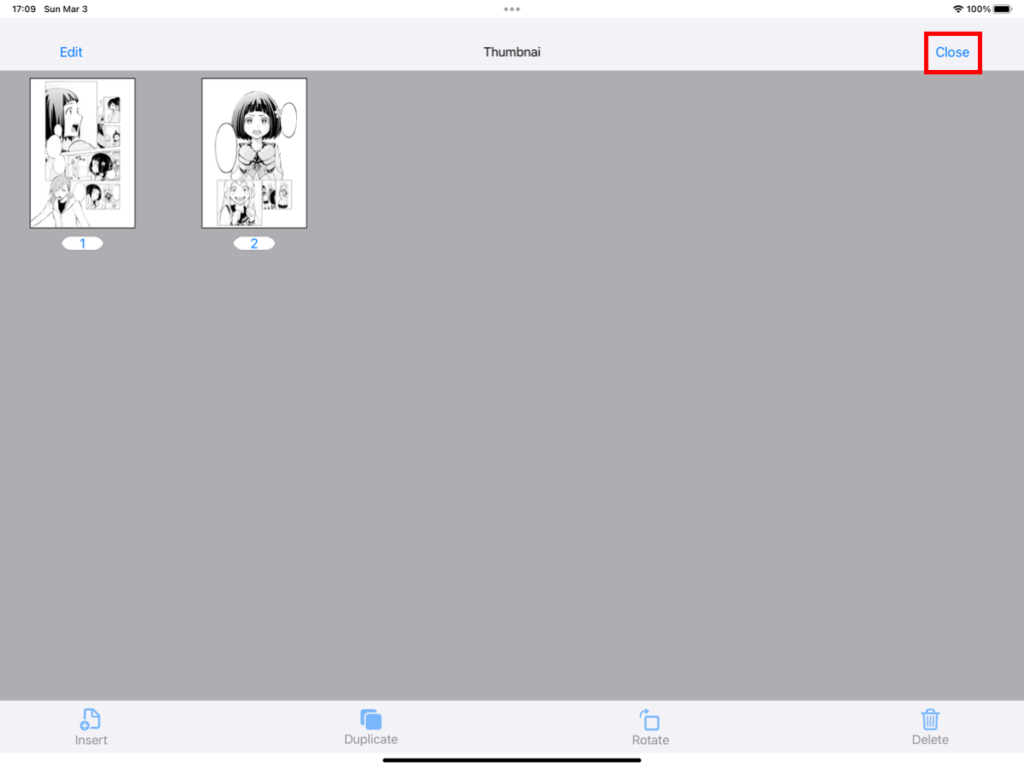
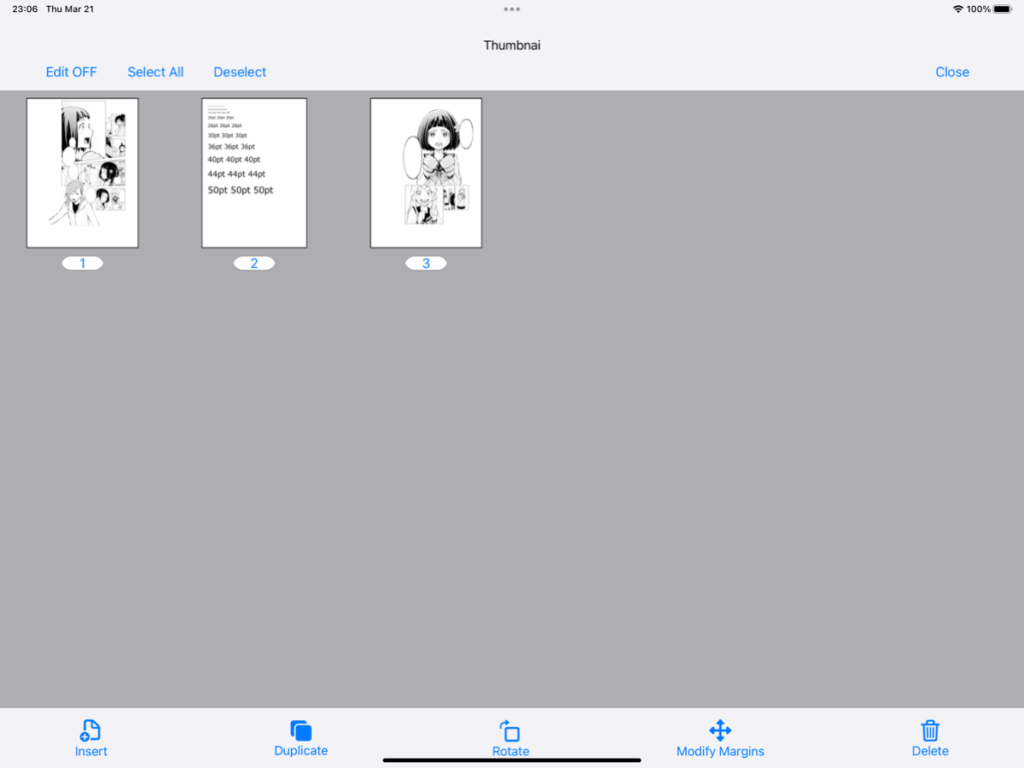
Display thumbnails and move pages
Touch “Thumbnail view” .

When the thumbnails are displayed in a list, touch the page you want to move to .if you want to close the thumbnails view, touch “close”.
Page editing (move, insert, duplicate, rotate, Modify Margins, delete) (Standard plan or higher required)
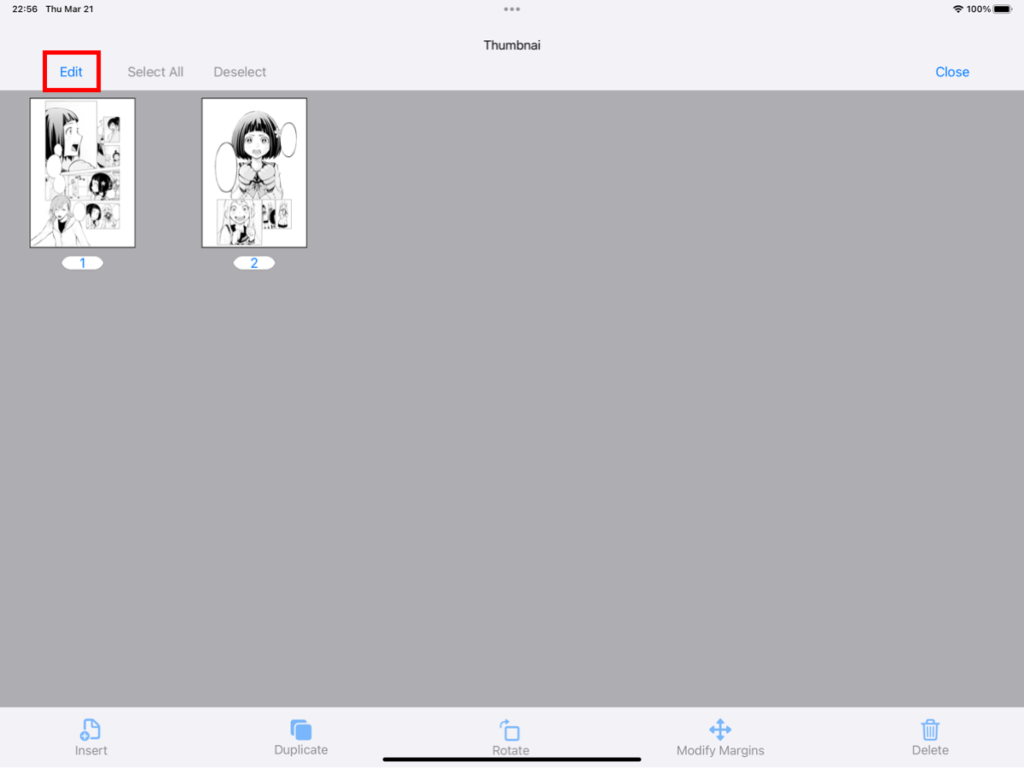
Touch “Thumbnail view” .
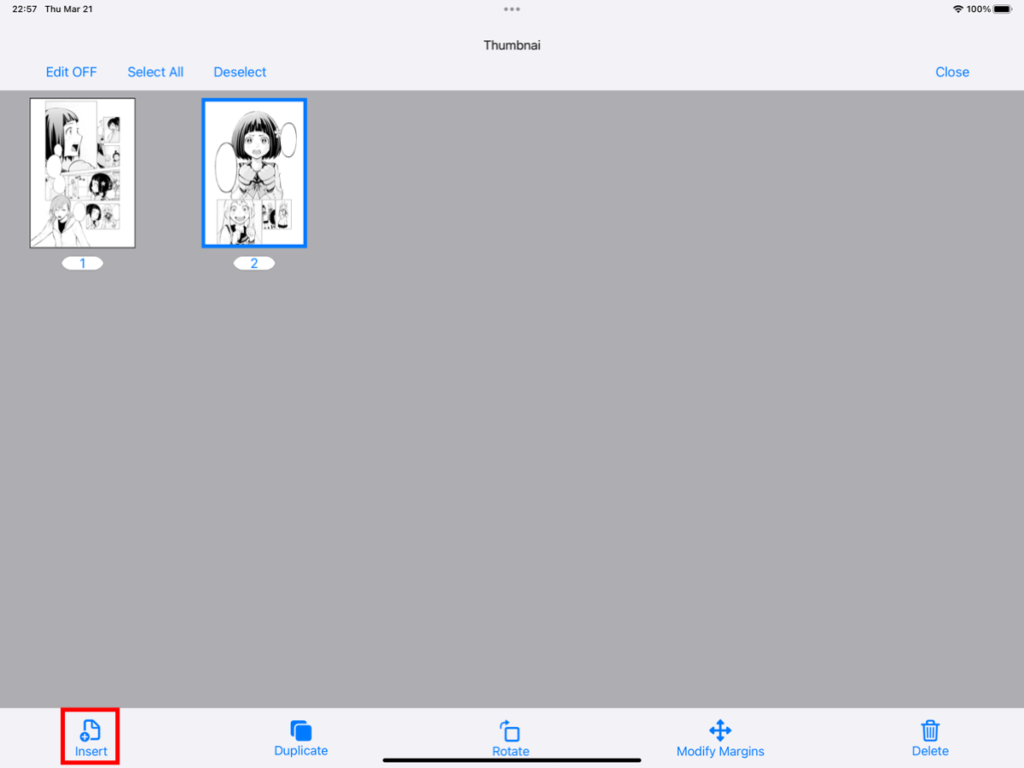
When the thumbnail View is displayed, select “Edit” at the top left to enter edit mode.
Insert page
Touch the page where you want to insert it to select it. Then touch “Insert” .
Touch and select the PDF file you want to insert .
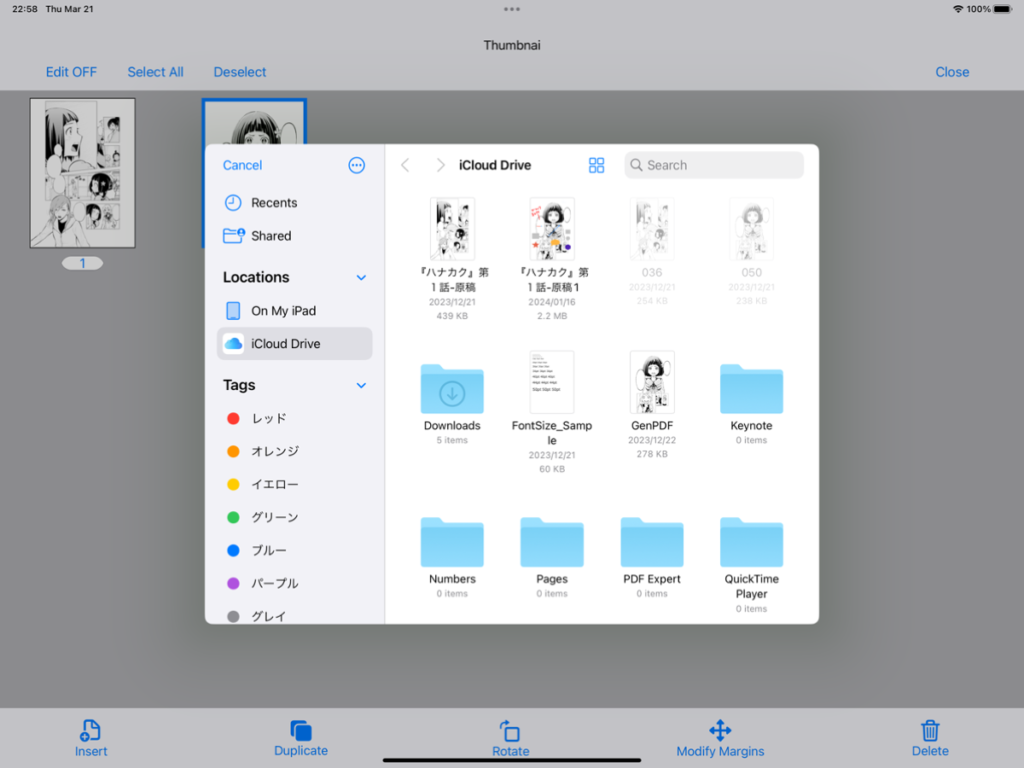
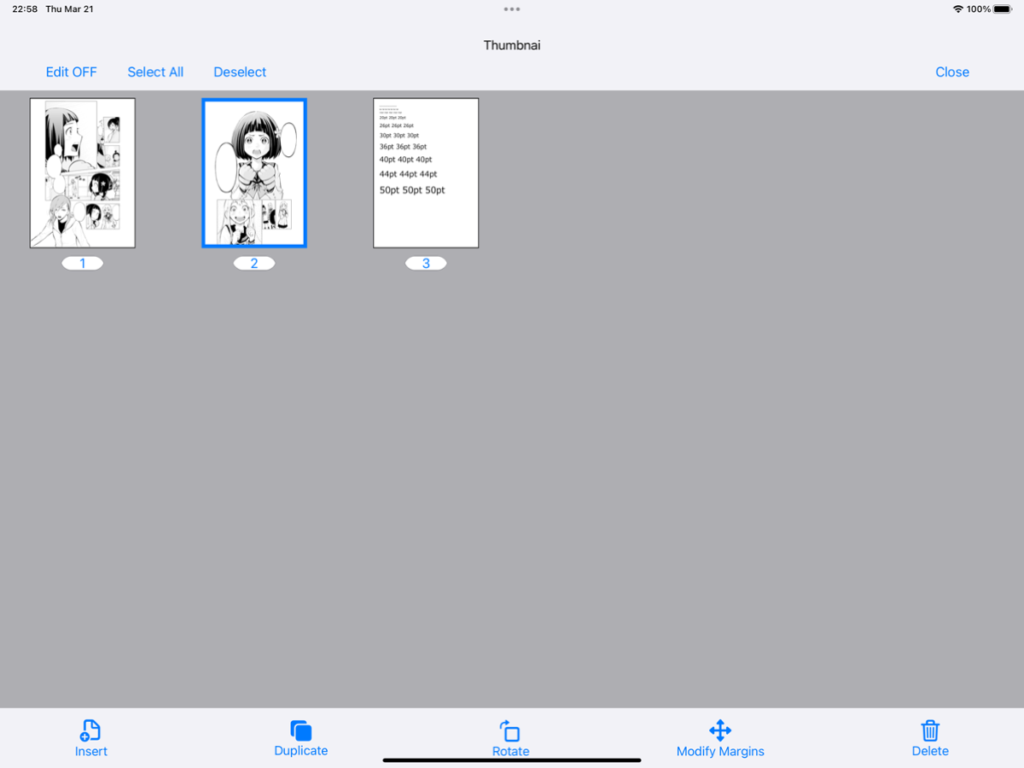
The page of the PDF file you selected earlier will be inserted after the selected page.
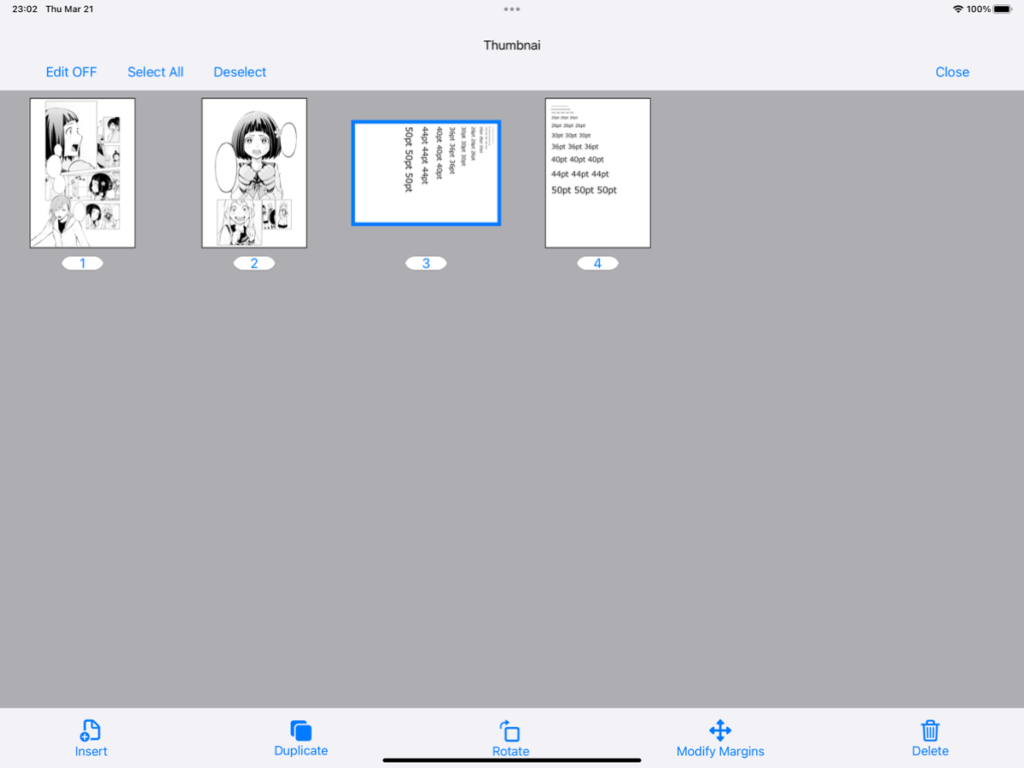
Duplicate a page
Touch the page you want to duplicate (multiple selections are possible) to select it. Then touch “Duplicate” .
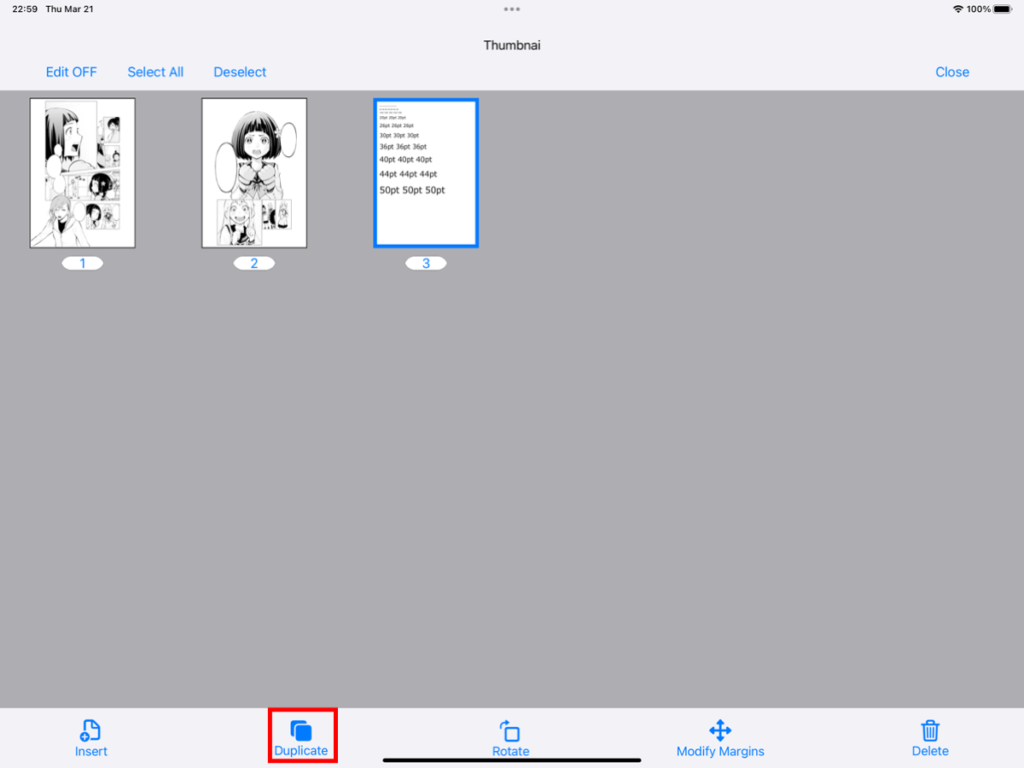
A duplicate of the selected page will be inserted after the selected page.

Rotate the page
Touch the page you want to rotate (multiple selections are possible) to select it. Then touch “Rotate” .

The selected page will rotate (clockwise).
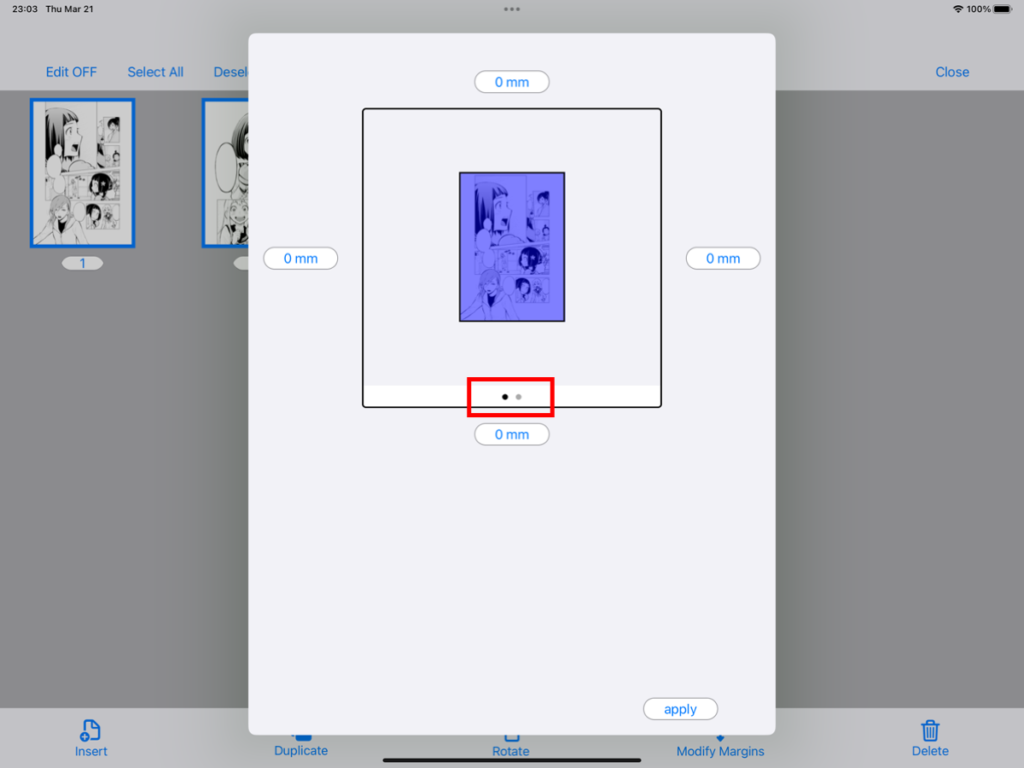
Modify margins
Touch the page whose margins you want to Modify (multiple selections are possible) to select it. Then touch “Modify Margins” .

The settings screen displays a preview of the changed size for each page. If multiple pages are selected, you can move between pages by swiping left or right .

To edit the margins, set the increase/decrease amount for the top, bottom, left, and right margins. Touch the value to change the settings .
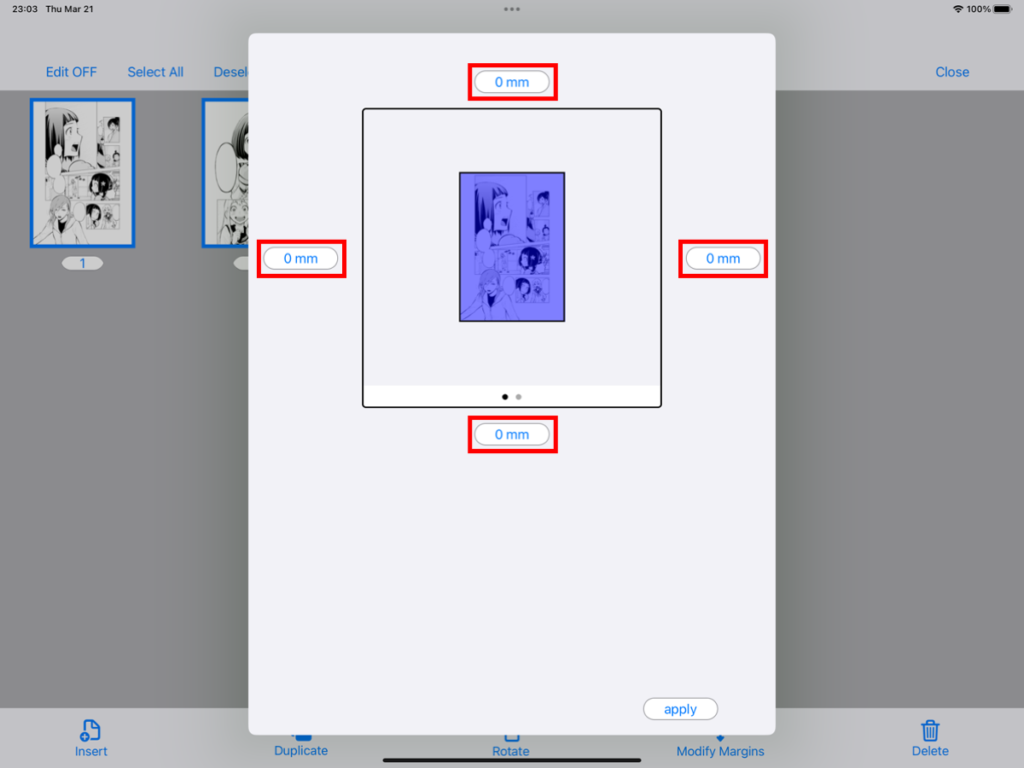
When you touch a number, a numeric keypad will appear. Set the value using the numeric keypad.
- “AC”: All clear. Set the number to zero.
- “+/-”: Switch between plus and minus
- “DEL”: Delete the last digit

When the settings are complete, touch “Apply”.

The margins will be increased or decreased for the selected page.

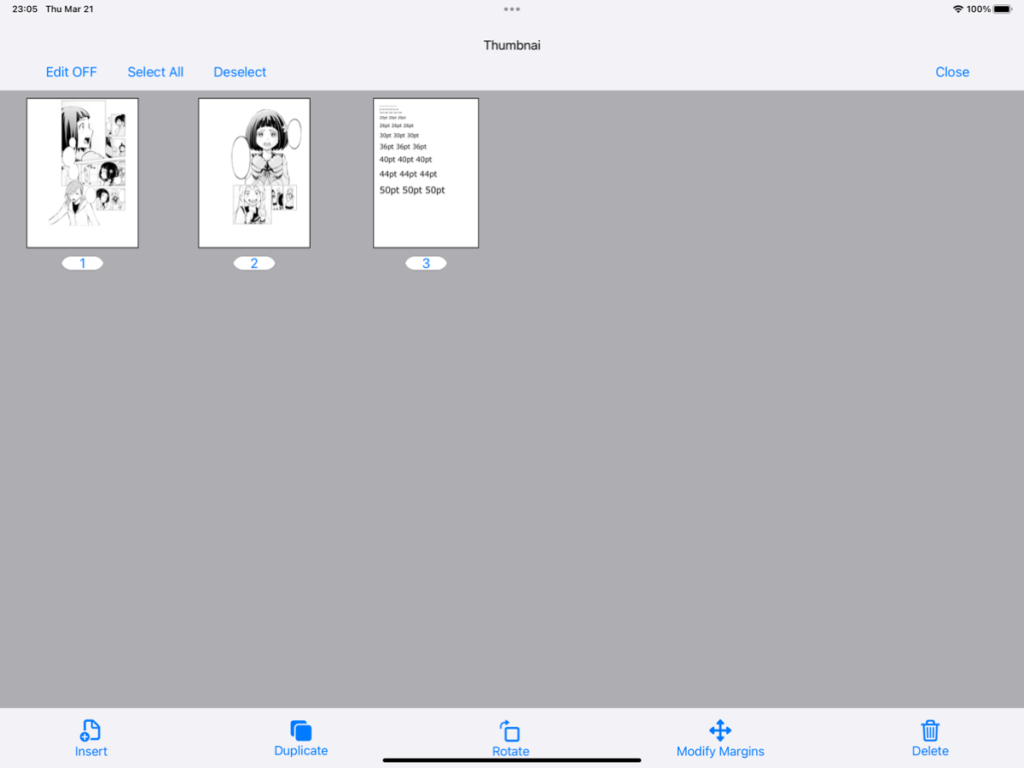
Delete page
Touch the page you want to delete (multiple selections are possible) to select it. Then touch “Delete” .
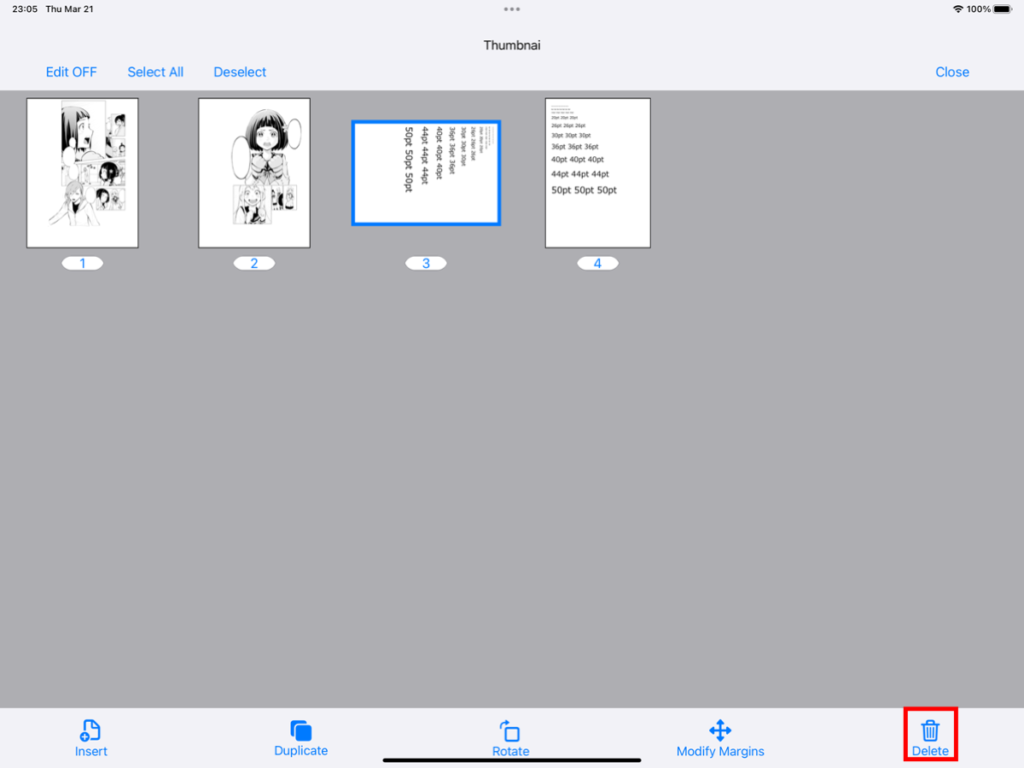
The selected page will be deleted.
Move page
If you keep touching the page you want to move , it will pop up.
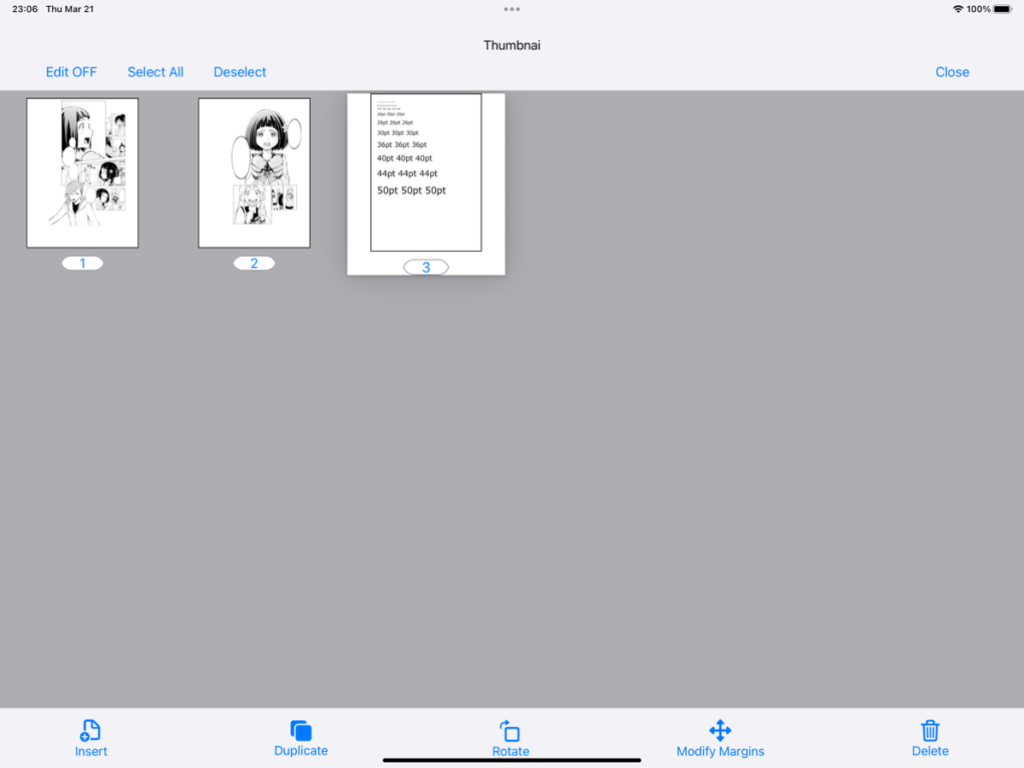
Drag and drop to the page you want to move.
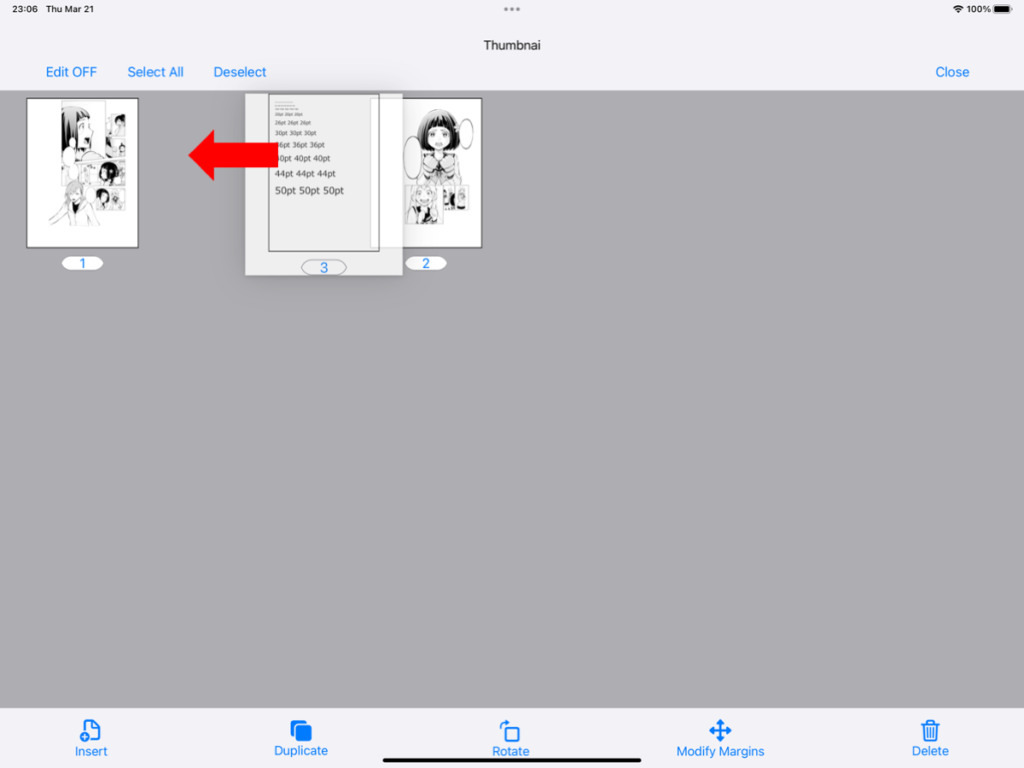
The page will move and the page number will be updated.
Other operations
Move page
If “Continuous” is off (no scrolling) and the screen size for “Facing” display is fit (the entire page is displayed), you can move the page by swiping left or right. The forward (backward) direction of the page changes depending on the selection status of “Right binding display” and “Left binding display”.

Zoom in and zoom out
Double-tap the screen to zoom in and out.


You can also zoom in and out by pinching with two fingers.
summary
This time, I explained how to use “EditOnPDF (Ver3.0)”.
Traditionally, in order to use a type Gauge, you had to first print it out on paper or enlarge the screen display on an iPad or other device to fit the actual size, but with this application, you can use it on an iPad to display it on paper. In the same way, you can intuitively determine the font size.